Microsoft Excel
Overview
Microsoft Excel is a spreadsheet software for data analysis and visualization. It is part of the Office 365 productivity suite. Find more information about how to access and install the Office 365 apps.
Create a Workbook
Excel workbooks can be created directly from the Excel app on the Office 365 landing page or from OneDrive or SharePoint. The online version of the app will automatically save as you work.
From Office 365 landing page:
- Sign in to office365.ku.edu.
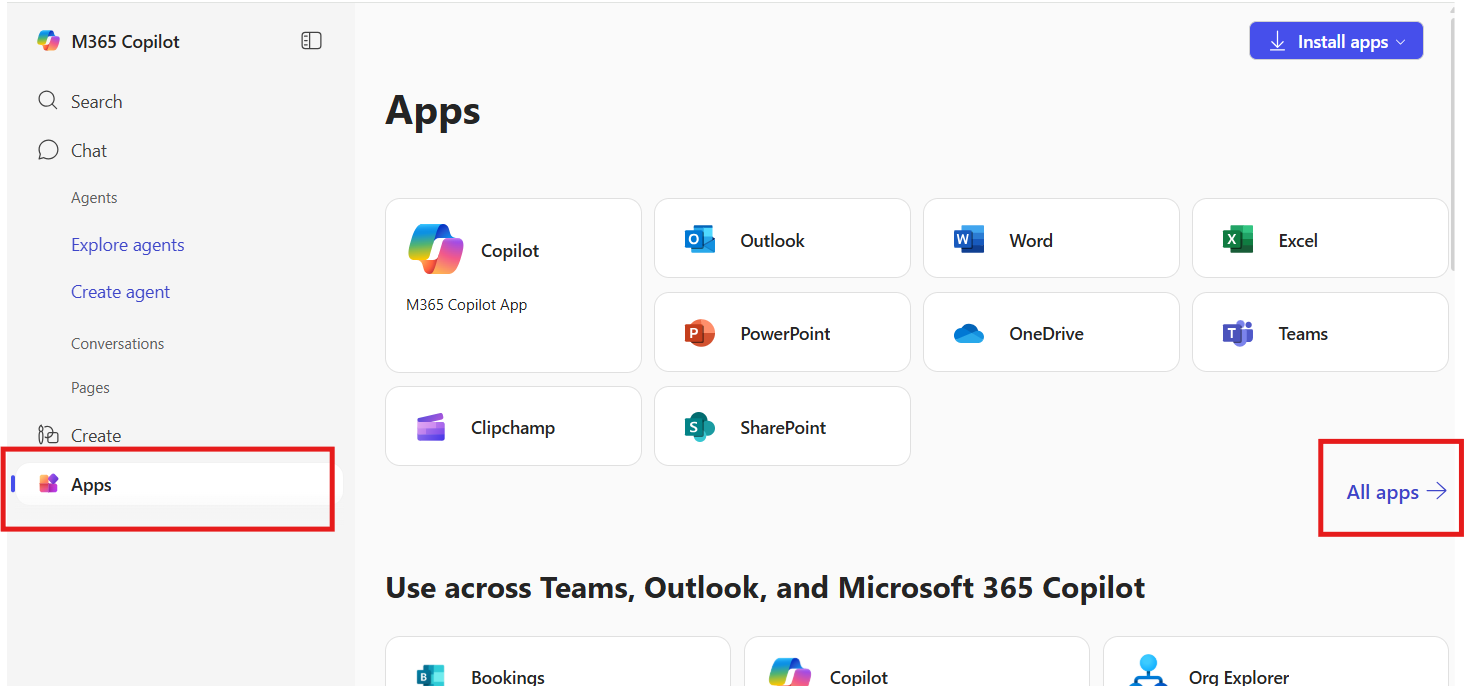
- Select Apps in the left menu, then All Apps to the far right of the interface.
View Screenshot - Select Excel tile from the display of apps, which are in alphabetical order.
- To rename the workbook, click the default name and type a new one.
From OneDrive or SharePoint:
- Open your OneDrive or SharePoint site where you want the file stored.
- Click +New in the top menu.
- Select Excel workbook.
Edit Workbooks
Workbooks can be edited with either Excel Online or the full-version of Excel installed on your computer. Excel Online does not have the full range of options that the full-version of Excel offers.
Excel Online
- Sign in to OneDrive, SharePoint site or location you have file saved.
- Locate the file and click the name.
- Make your edits. If you are not able to make edits, you may be in read-only mode. Click Edit Workbook followed by Edit in Excel Online.
- All changes are saved automatically as you work.
With Excel Online, multiple people can make changes simultaneously. You will see changes in real-time as the others are working as long as everyone is using Excel Online.
Full-Version Excel
- While viewing the workbook in Excel Online, click Open in Desktop app below the title of the file.
- Changes can be saved manually or you may select AutoSave at the top-left area of your document. Click on the button next to AutoSave to toggle On or Off.
In the full-version of Excel, you are not able to make changes simultaneously. Changes must be saved before others will be able to see them.
Share Workbooks
Once created, workbooks can be shared with others, both internal and external to KU. You can decide if people will receive read-only access or editing options to the file.
Go to our Sharing Files page for step-by-step processes about how to share a file, stop sharing, setting edit and download permissions, and secure sharing.
Ensure Accessibility
It's important to ensure your Excel file is accessible to all users. KU's Content Accessibility page has information about accessible files and view a how-to video on creating accessible files, including Excel. You can review the video and tips on creating an accessible Excel file.
Tips and Tricks
The following tips and tricks reference functionality in Excel 2016, however most should be applicable to earlier versions of Excel for Mac and PC.
Select and Resize All
You might know how to select all by using the Ctrl + A shortcut, but you can also select the corner where the row headings and column headings intersect to select the entire worksheet. Once you’ve selected the entire worksheet using the method above, you can automatically resize all column widths to fit the longest cell in the column by double clicking in between any of the columns.
Add Multiple Rows and Columns
You may know that you can create a new row or column by selecting a column or row and then right clicking and choosing Insert. However, if you want to insert multiple rows and columns, you can simply highlight the number of rows or columns that you want to insert. Then, right click and choose Insert. New rows will be inserted above the row or to the left of the column you first selected.
Add Multiple Rows/Columns at Once (video)
Auto Fill
When you want to copy a formula or cell to all the cells below, you can hover in the lower right corner of the cell to get the Autofill Handle. It looks like a tiny black cross.
Once you see the autofill handle, you can drag it to the bottom right corner of the last cell you want the cell copied to. Or, you can double click, and the cell will be copied down to the first empty row.
Flash Fill
If you have Excel 2013, you can take advantage of Flash Fill to fill a data column based on a pattern. Excel 2013 will present Flash Fill when it recognizes a pattern and works best when your data has some consistency. You can only use Flash Fill with a column adjacent to the ones that you are references. To use Flash Fill, begin filling in a column that references another column working from the first cell then moving downward. Once you enter a few of the cells and Excel recognizes the patter, you'll see the rest of your data listed below in a grey font. Once you see the grey Flashfill data, you can press Enter on the keyboard to accept.
If you miss the grey Flash Fill options, you can use the autofill option to fill down. Then, you can select the autofill options and choose Flash Fill.
Combine Text with Ampersand (&)
In addition to using the concatenate function to combine cells, you can use the ampersand character to combine cells with text.
Combine Text with an Ampersand (&) (video)
Select Data Using Ctrl
When you click the Ctrl key plus any arrow button on the keyboard, you can jump to the edge of the sheet in different directions. If you want to jump to the bottom line of the data, just try to click Ctrl + the down arrow. Using this method and adding the Shift key, you can select entire rows or columns. For example, if you want to select a column of data, select the first cell and then click Ctrl + Shift + the down arrow.
Select Date Using Ctrl (video)
View Average, Count, Values, Sum
Most users know how to check the data status in the bottom of an Excel sheet, like Average and Sum Value. However, do you know you can move the pointer to the bottom tab and right click to get more status, as shown below? Right click in that area and you will be able to see more summary options.
Create Shortcut Menu
In any Microsoft Office 2013 program, you can right click on any tool in the toolbar to add it to the Quick Access Menu at the top of your screen. The benefit of adding tools that you often use to this menu is that you automatically create a shortcut menu. To select the tools in the menu, you can click the Alt key and then press the number corresponding with the order of the tools at the top.
Transpose Row to a Column
You would use this feature if you want to transpose data to get a better display; however, retyping all data would be the last thing you would need to do if you know how to use the Transpose function in Paste. Here’s how: copy the area you want to transpose, move the pointer to another blank location. Go to Home > Paste > Transpose, please note that this function won’t activate until you copy the data first.
Support
Technical support: ithelpdesk@ku.edu | 785-864-8080