Teams Features
Overview
This page reviews the features of Teams after you have joined or created a Teams. If you need to learn how to create or join a team, downloading the desktop app, managing your teams, etc. go to our Getting Started in Teams page.
Teams Channels
Each team comes with a General channel by default with the option to create additional channels that represent topics, work groups, or themes. Standard channels are visible to everyone, but private and shared channels have permissions that can be managed by the channel creator.
About Channels (video) (2:35)
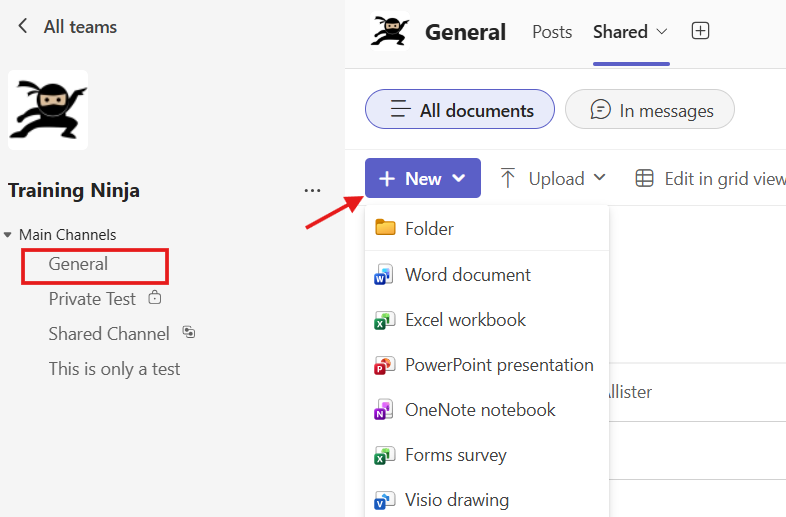
Create a New Channel
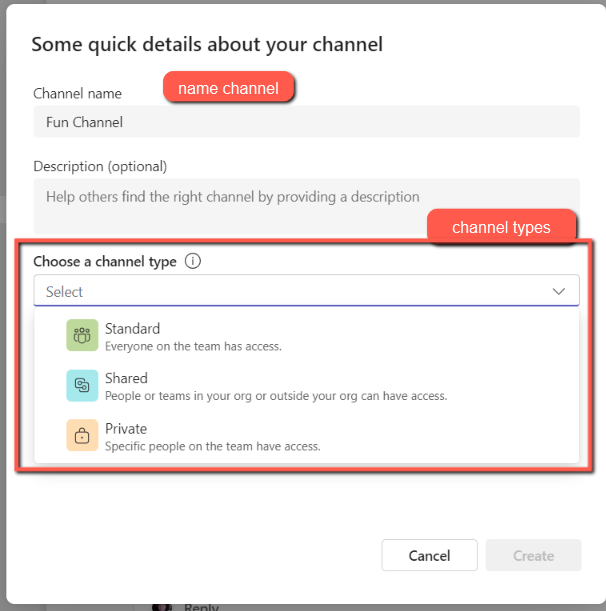
Select More options […] next to the Team name > Add channel > provide a name for your channel > choose Standard, Private channel, or Shared channel.
View ScreenshotUnder Choose channel type, make your selection.
Standard, Private, Shared Channels
Standard Channels
Everyone on a team has access to standard channels.
Private Channels
- Private channels can only be seen by the person who created the channel (channel owner) and members added to the channel.
- Members added to this channel must already be a member on the team.
- Anyone can add private channels unless Team owners change that permission. [under Manage Team > Settings > Member permissions/Guest permissions].
- Team owners do not have access to a private channel unless they create it or are added to the channel by the channel owner.
- Team owners can delete any private channel.
- Private channels create their own SharePoint document libraries accessible only to those who are channel owners and members of that channel.
- You cannot schedule meetings.
- Does not support some apps like Planner.
Shared Channels
- You can add people to this channel not already on your team.
- Those added may be from KU or an external organization with a licensed Team tenant.
- Those added to this channel can see the shared channel and no others.
- All Members on your team can see the shared channel without having to be added, but Guests do not have access.
- Before you add external users, create a ticket withour Office 365 admin to work with the other organization to configure access to our tenant, if not already set up.
Microsoft's support page: Chart comparing standard, private, and shared channel specifications
Restore Deleted Channel
Deleted channels are permanently deleted after 30 days. Before that time, team owners have the option to restore the channel back to your active list of channels.
- Hover over team name and select More options [...] to the right of the name.
- Select Manage team.
- Select the Channels tab from the top menu.
- Below all of your Active channels, select the Deleted dropdown option.
- Select Restore to the right of channel name.
Channels and SharePoint Folders
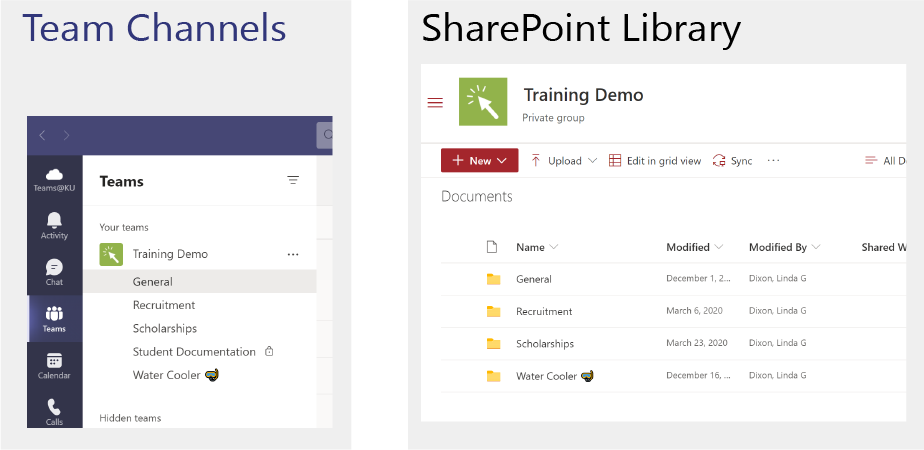
Creating a Standard Channel in Teams creates a corresponding folder in the SharePoint Document library.
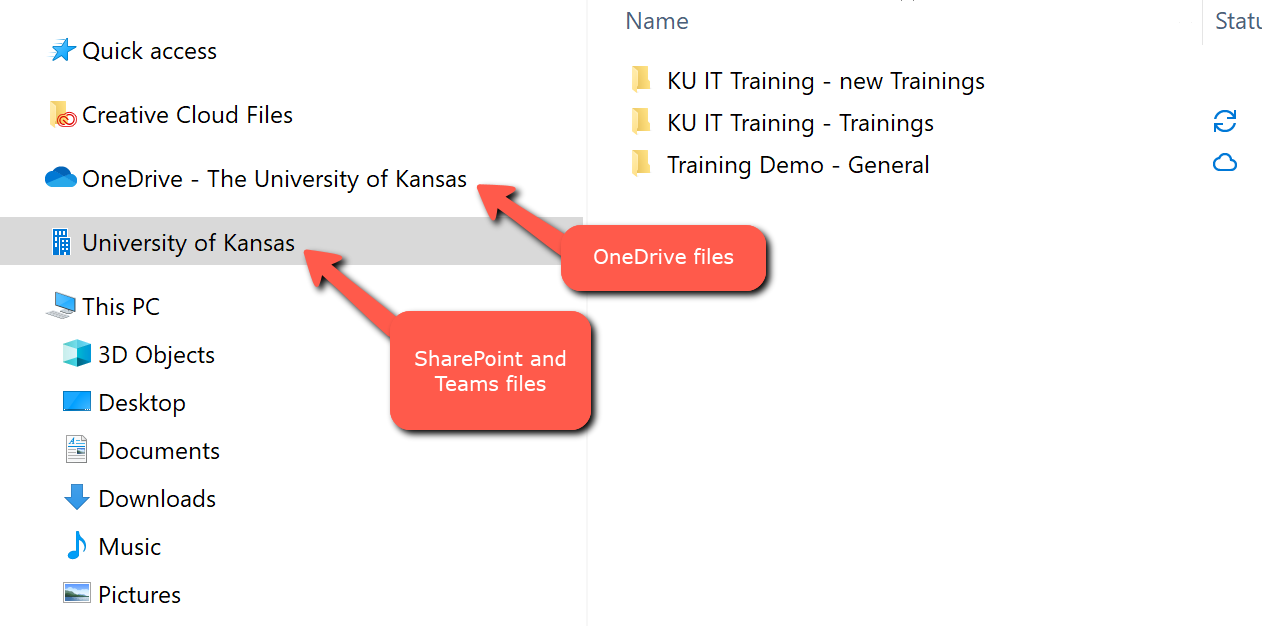
View ScreenshotTeams channels (on the left) will create respective folders (on the right).
All folders and files created and uploaded within these folders from SharePoint will sync back to your team's channels.
If you create a folder in SharePoint that exists outside of the folders created by channels, it will not sync back to Teams unless you create a new channel with the same name as the new folder.
It is a best practice to always create channels in Teams first to easily create syncing.
Channel Menu Options
Pin will place the channel at the top of your list. Only available in List view.
Manage channel to set moderation preferences.
Get email address allows you to copy the email address of this channel, which enables you to email the channel. The message will appear in posts.
Note: By default, only KU internal addresses are allowed to email directly to a channel. Requests for external email addresses need to be evaluated by IT.
Get link to channel allows you send a link for others to access your public team or add the URL to your SharePoint site for quick navigation.
Edit this channel - Edit channel name and description – This does not automatically change the name of the folder in SharePoint. You must go to SharePoint to change the name of the folder.
Connectors keep your team current by delivering content and updates from services you frequently use directly into a channel.
Delete this channel – By default, everyone is allowed to delete a channel. Team owners can change the permission on who is allowed to delete channels [under Manage Team > Settings > Member permissions/Guest permissions].
Teams Notifications
Notifications are sent when you are mentioned in a post, messages are posted in the Posts tab or Chat, and other activities, such as membership changes, seeing when someone is on or offline, meeting notifications, etc.
How You Receive Notifications
- Your feed notifications will show on the Activity icon at the top part of your app bar and on the Desktop app.
View ScreenshotActivity icon and desktop icon showing notifications.
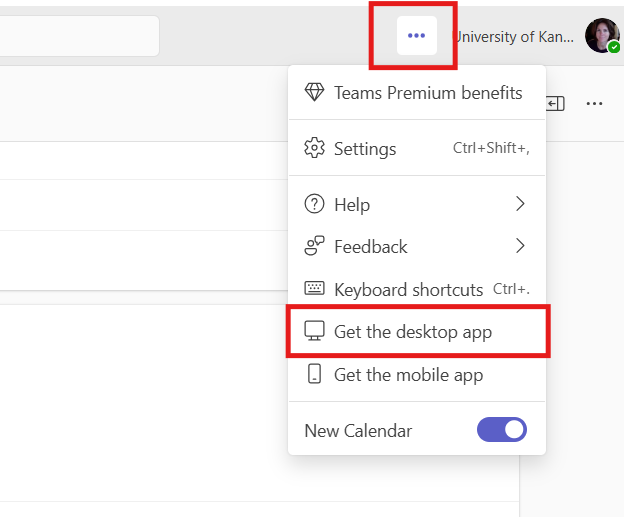
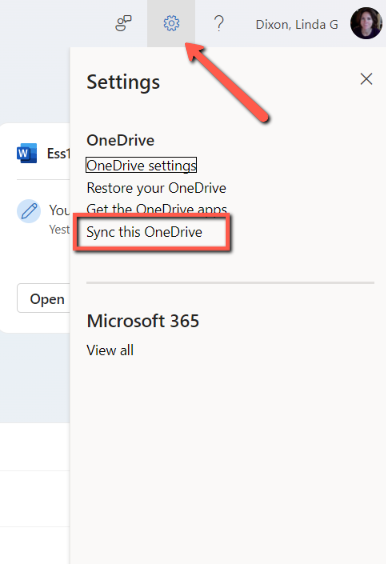
If you don't have the Desktop app in your toolbar, you can download it from the Teams web app under Settings.
View ScreenshotSelect 3 dots at top-right of screen, select Download desktop app. - If banner notification is selected, a rectangle message will slide out from the right side of your screen for a few moments, then will disappear.
- Email notifications will happen only when you are not logged in to Teams.
Manage Notification Preferences
You can change email, banner, and feed preferences from different areas in teams. Manage your notifications from Settings, conversations, and channels.
Notifications from Settings
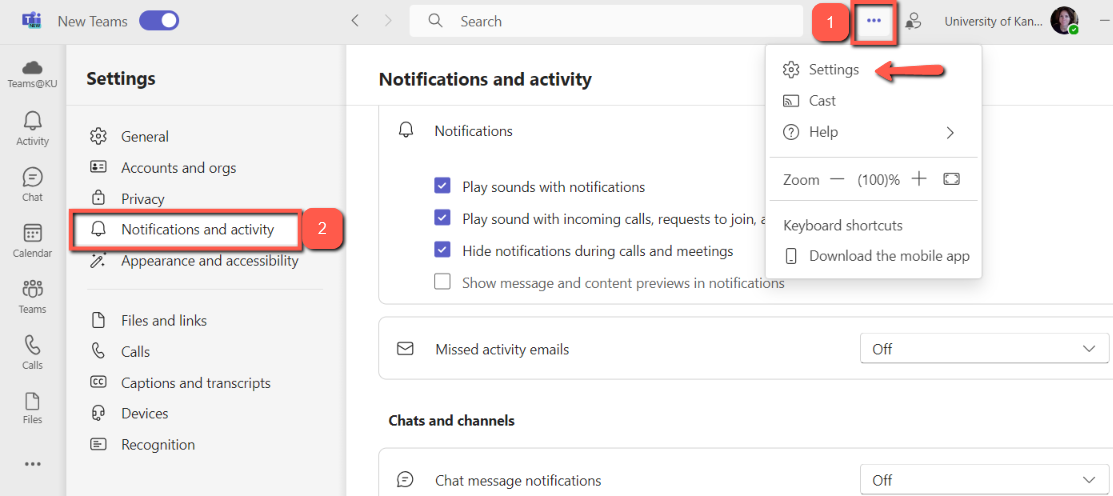
Select Settings icon (3-dot icon at the top-right of screen) > Settings > Notifications and activities from the left panel. From here, you can choose a variety of notification settings.
View ScreenshotChoose the Setting icon at top, then Notifications and activity from left panel.
Channel Notifications
- Hover over the channel name and select More options […].
- Choose Channel notifications.
- Change options.
Mention a Person, Channel or Team
When posting in a channel, use the "@" symbol followed by the name of a person, channel, or the name of the team. This will send a notification to that person or team based on their preferences.
Hide/Show Channels
By default, all channels and teams are visible, allowing you to receive notifications for teams and channels that you haven’t hidden from your list. You can choose Show or Hide to ensure you get notifications from teams and channels you care about.
- Hover over channel or team, then select More options [...] on the right of the channel name.
- Select Hide channel/team.
View ScreenshotSelect 3 dots to right of channel name, select Hide from the panel.
Your hidden channels and teams will be condensed in your list, but will remain available if you want to bring them back at a later time. Once you hide a channel or team, you will no longer receive notifications for them until you bring them back.
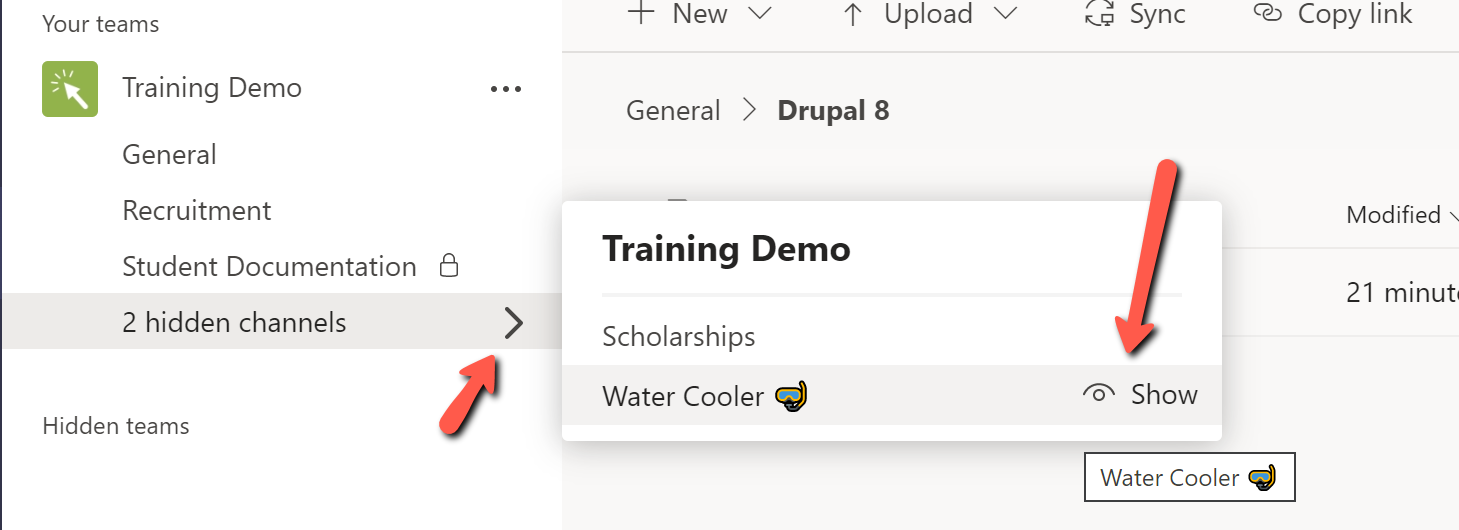
To bring the channel back:
- Hover over Hidden channel and select the arrow > to the right of your channel.
- Select Show next to the team/channel you want to bring back.
View ScreenshotSelect 3 dots to right of channel name, select Show from the panel.
NOTE: You cannot hide the General channel.
Teams Posts and Chat
Microsoft Teams supports a variety of ways to communicate with your team, including group conversations in the Posts tab, private Chats, calls, meetings, and breakout sessions.
Channel Posts
All members of a team can view and add to conversations in the Posts tab in any standard channel. These conversations can be seen by everyone on the team. Documents can be attached and shared in a post and are automatically saved to the Shared tab of that channel. Posts are different from Chats because they are visible to everyone in a channel and not private.
- Persistent chat will keep all posts without the need to archive. You can search all posts by keywords or headings.
- Mentions can be created by typing ‘@’ before an individual’s name, channel name, or team name. Notifications to be sent to those included in the mention based on their notification settings, which can be adjusted as needed.
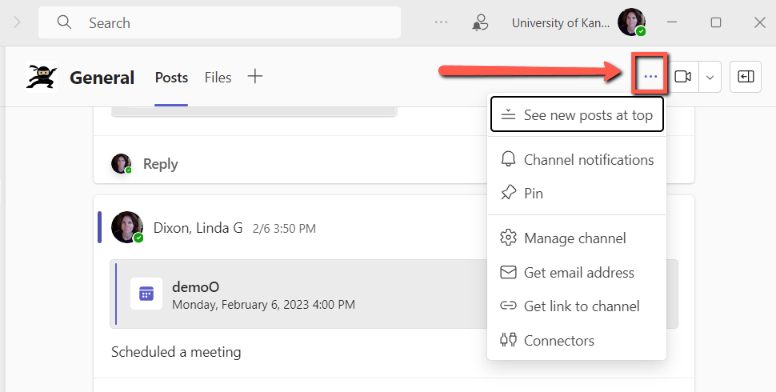
- Change Post order by bringing the newest post to the top instead of the bottom. Go to the Channel settings [3 dots next to the video icon at the top-right].
View ScreenshotClick on 3 dots next to video icon.
More Options
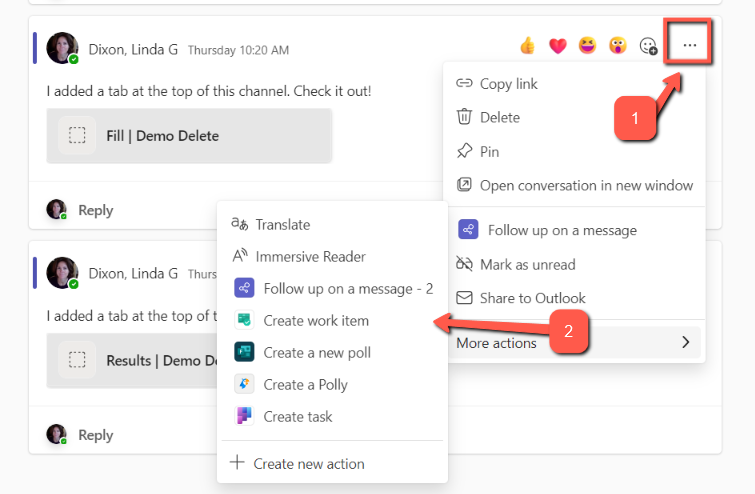
Hover over the right corner of a post to bring up a response emoji. Select More options […] to bring up additional options.
View ScreenshotHover over conversation to bring up emojis and select 3 dots to bring up additional options.
- Team owners can delete any post; members can only delete their own post
- Members can edit their own messages only
- Team owners can delete any message
Review of More Options
- Copy link to share a post in another team or chat message.
- Pin allows you to pin posts in the channel information panel. To view pinned items, go to the Show Channel Info icon at the top-right of the screen. You'll find your pinned posts towards the bottom of this panel.
- More Actions allows you to add polls to your posts. Select More actions and a new panel will give you the following options:
- Translate will translate the post into the language chosen in your Settings. English is set by default.
- Immersive Reader can read text for users, adjust font size, etc.
- Create automated processes using Power Automate, including polls, takes, follow up on messages, etc.
NOTE: Save message will not be an option in New Teams.
Additional Post Options and Tools
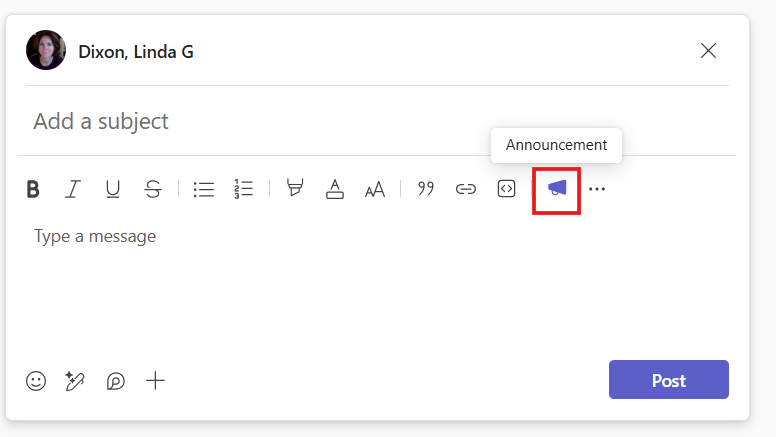
By default, posts come with formatting tools and a subject line to make it easier to find the post later.
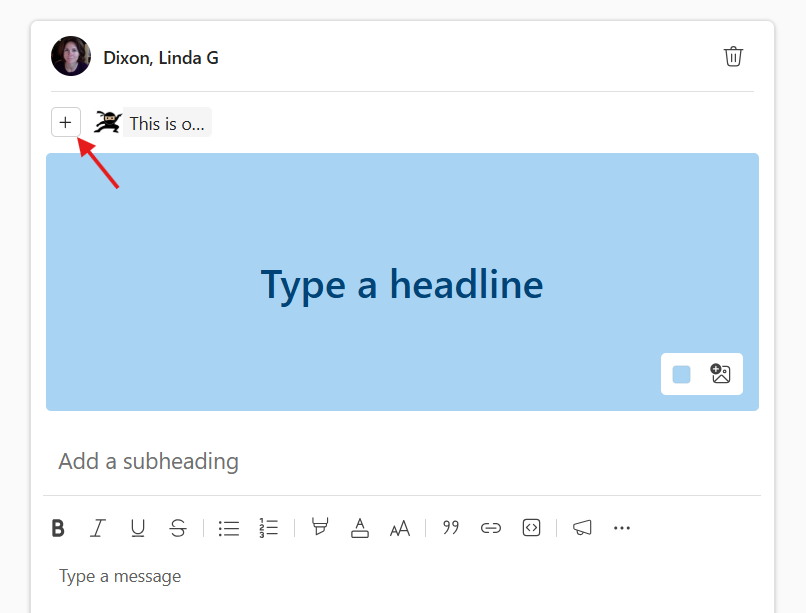
- Add an Announcement, which creates a more noticeable post: select the megaphone icon in your text tools.
View Screenshot
Post announcement in multiple Team channels:- After you select Announcement, select the Plus icon at the bottom left area of your post > select Post in other channels.
View ScreenshotSelect Choose the Select channels button to bring up teams and channel options. - Select Multiple channels.
- Select the Plus icon to the right of your team's channels above the announcement banner.
View Screenshot - Select the checkbox(es) next to the channels you want to add, then Update.
- After you select Announcement, select the Plus icon at the bottom left area of your post > select Post in other channels.
- Use the paper clip icon to attach a file or drag and drop the file into the message. All attached files will be saved in your Shared tab.
- You can add GIFs and stickers or send a Praise. These can also be turned off by Team owners: select More options [...] next to the team name > Manage team > Settings tab > Fun stuff > deselect features.
- The Stream icon that takes you to where your Teams videos are stored. Currently, Stream is being revamped and will not load recordings. All channel recordings will be saved in your SharePoint library in a folder titled Recordings.
Start a Chat
Chat allows you to have private, one-on-one or group conversations that are not in the public team channel.
- Click in the Search field at the top of the screen and begin typing the name of the person you want to chat with.
- Select their name from the drop-down choices.
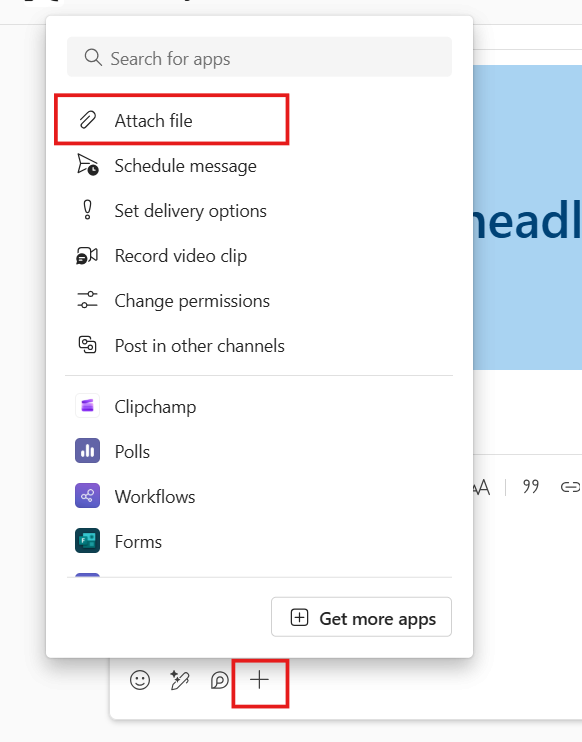
Attach Files
Attach files by using the paper clip or drag and drop into the message area.
To find the files later:
- Select the chat where the file was posted and select the Shared tab.
- You can also view all your files by selecting on OneDrive icon in the left panel. Files from all of your chats and channels will be located here.
Select 3 dots in app bar on left edge of screen, type files, select Files.
All chat files will be stored in your OneDrive for Business in the Microsoft Teams Chat Shared folder.
- To pin your OneDrive app to the app bar for easy access, right-click on the app and select Pin.
Other Options
You have the option to create a meeting, call, and share screen. You can also add additional people to the chat as needed.
Files in Teams
The Shared tab displays all of a team’s files within a given channel, which are stored in you Team's SharePoint Document library.
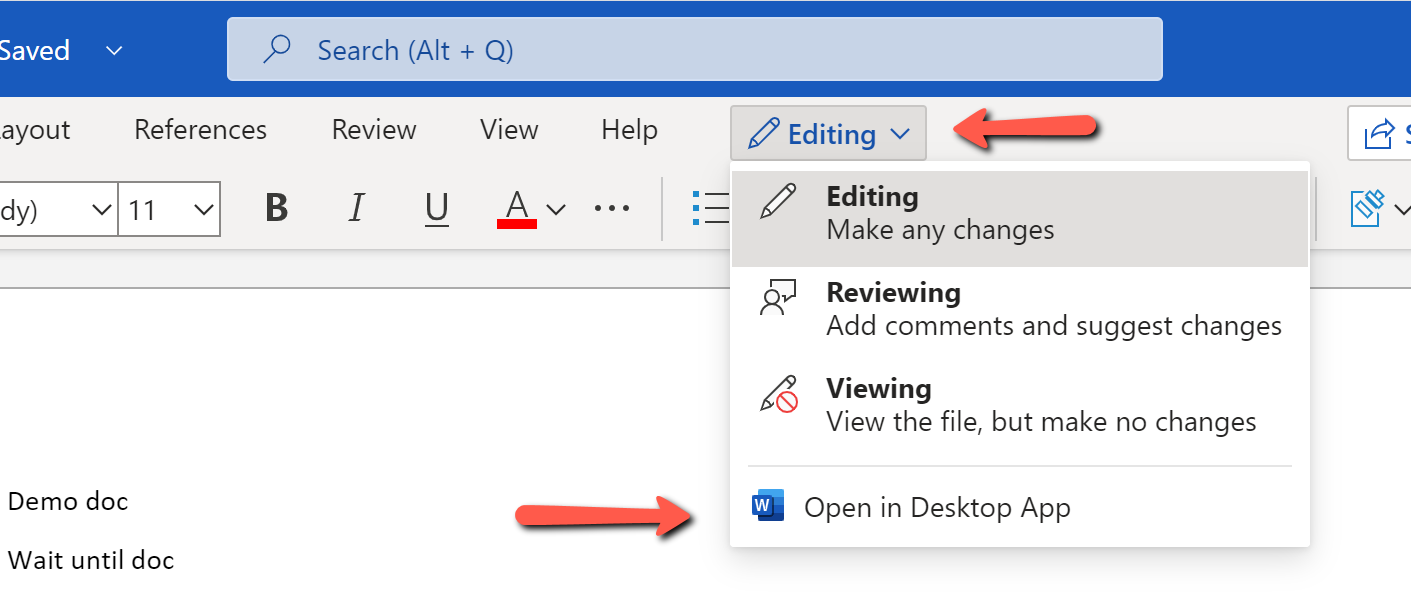
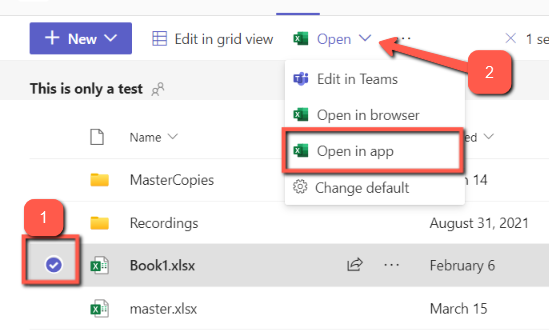
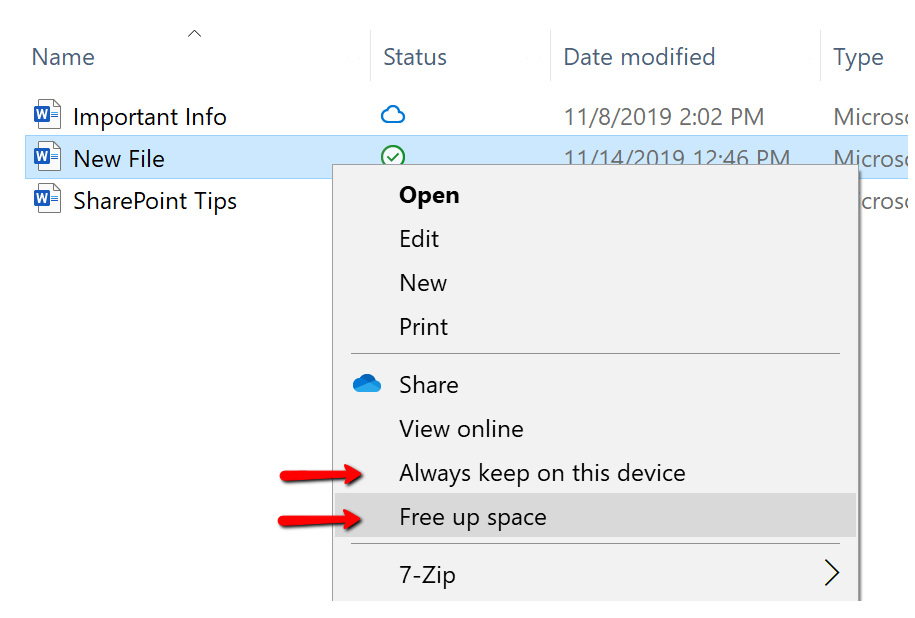
Browser vs. Desktop App
By default, opening files from the cloud will open them in the browser. You have many of the tools you expect from the file, but not all. Access to all the tools will be in the Desktop versions of the files.
If you want to change the default so that your files open in the Desktop app:
- Select Settings
- OneDrive from the left panel
- Select Desktop app from the drop-down list
Desktop App Default (video) 0:25
Select Create New Poll link.
SharePoint in Background
Your Microsoft Team also comes with a SharePoint site. All Teams files are stored in the document library found on that site which you can access by clicking Open in SharePoint in the Shared tab.
Each channel will be assigned its own folder in SharePoint.
- If you add a channel in Teams, it will be stored as a folder in a SharePoint library.
- If you change the name of the Teams channel, it will not automatically change the name of the folder in SharePoint. You must do this manually.
Go to SharePoint Document Libraries for more information about managing folders in Teams and SharePoint.
Private Channels in SharePoint
When a private channel is created, a new, abbreviated SharePoint site is created just for that channel. This ensures any files created in the private channel can only be accessed by those who are owners/members/guests of that channel. The channel will have the same name as the team with Private channel added to the end of the name [Team name - private channel name]. Go to Teams Channels in the left index of this page to learn more about private channels.
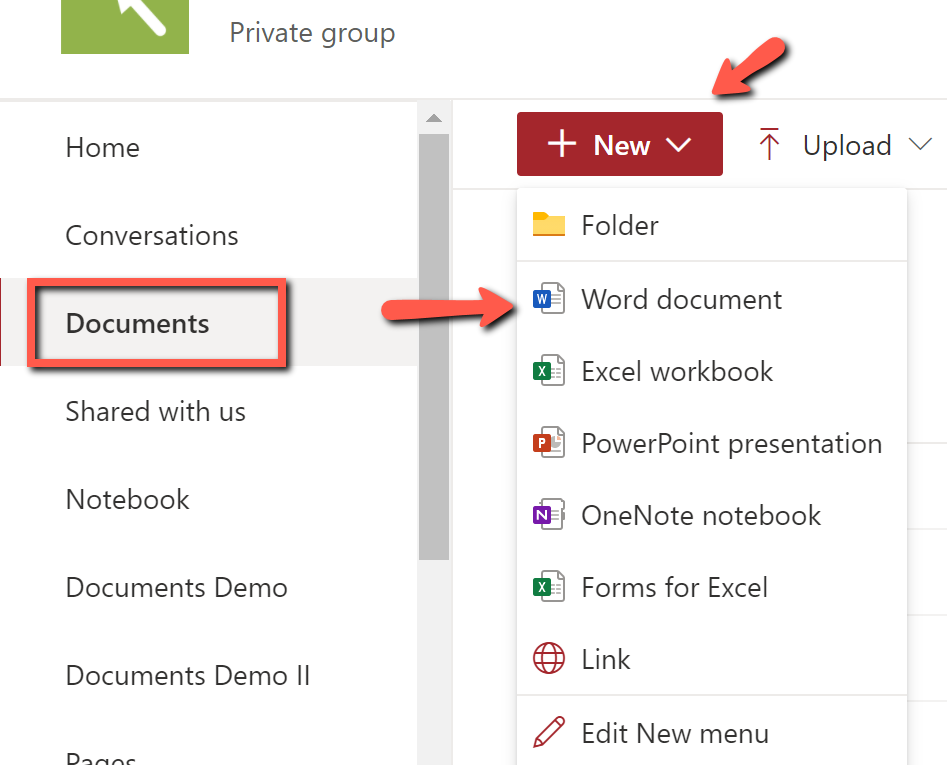
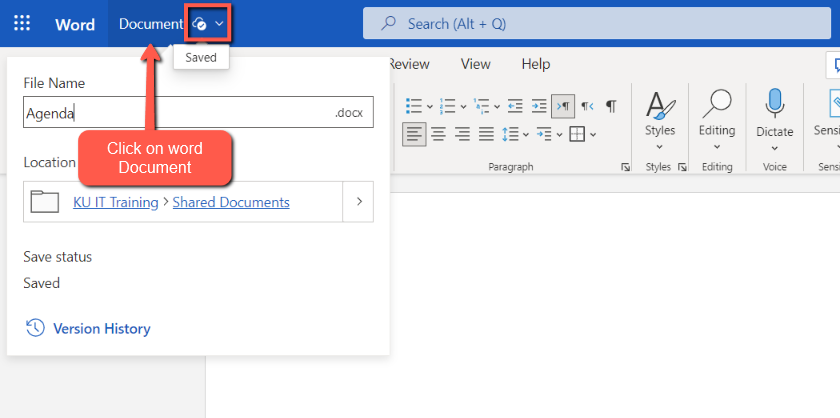
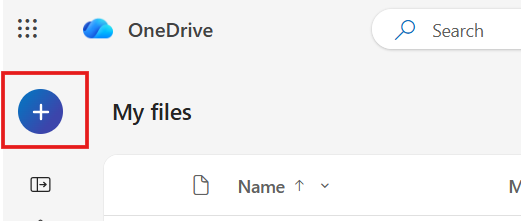
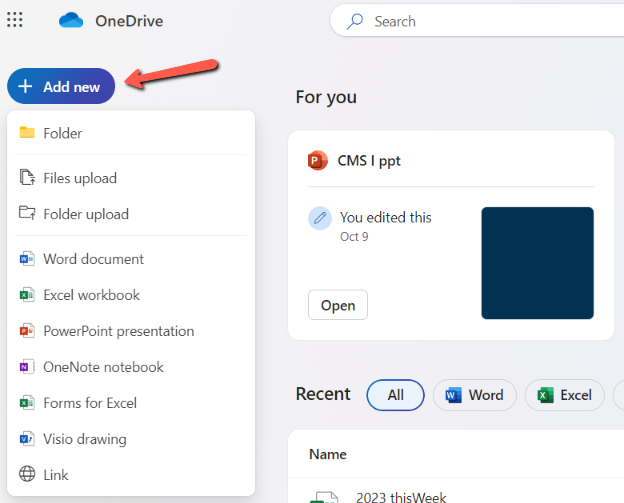
Create Files
Upload Files
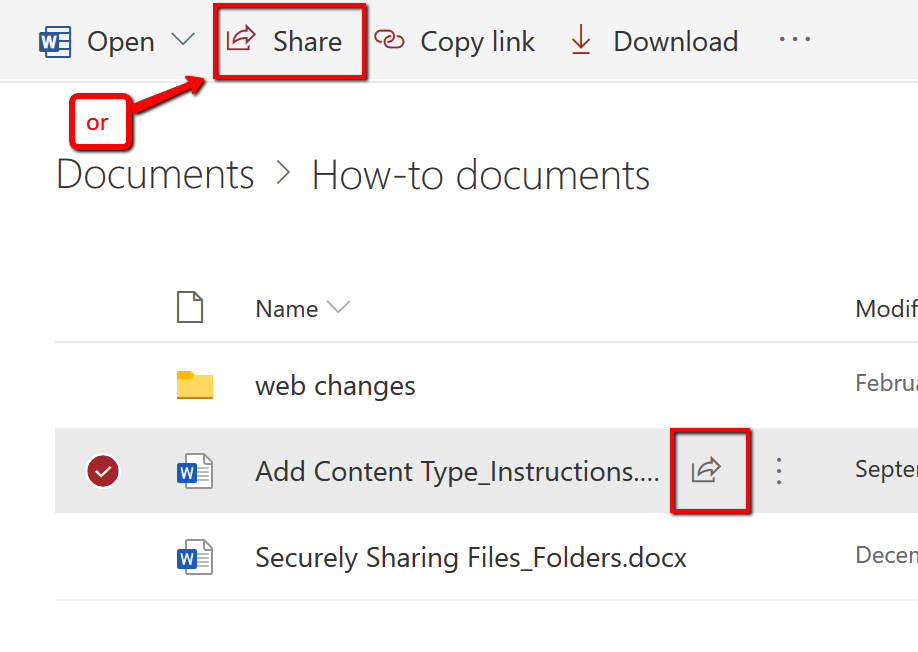
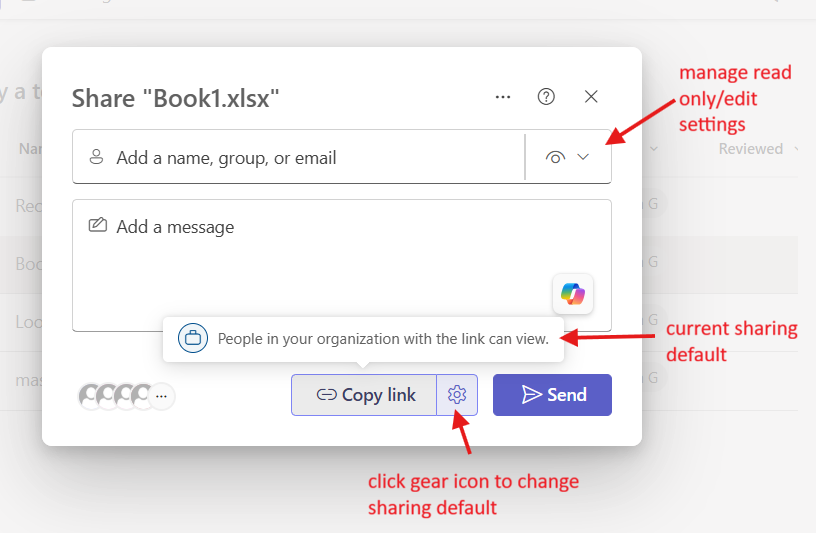
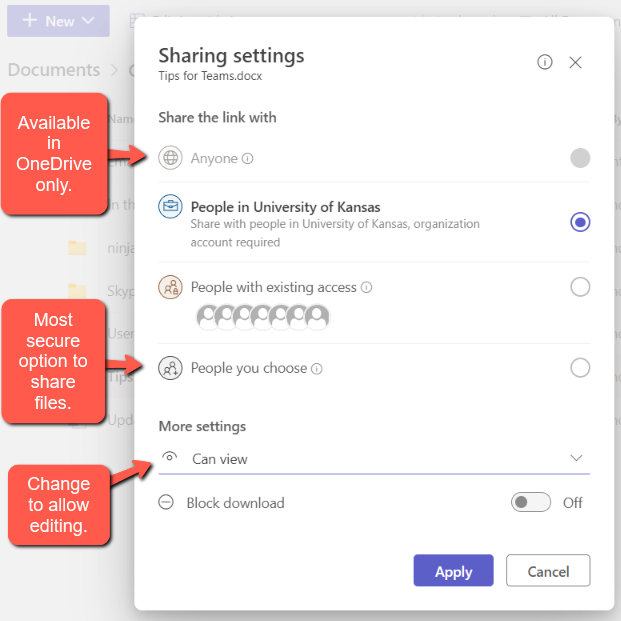
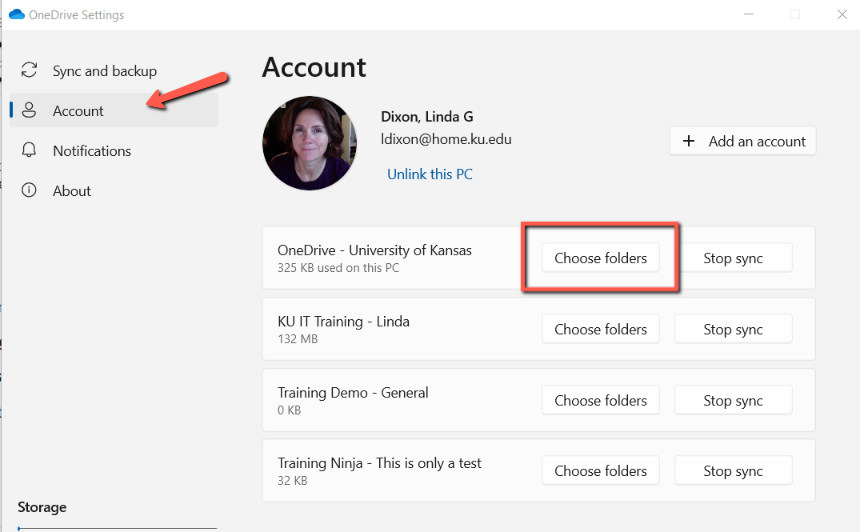
Share Files
Sync Folders
Quit Teams
If you need to fully quit Teams and restart, it requires more than closing the interface if you are using the desktop app.
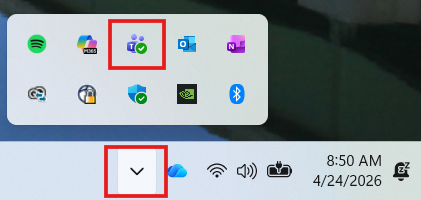
For Windows users, your open app should be in your systems tray located on the right side of your toolbar. Open the systems tray > right click the Teams icon to find Quit.
View Screenshot
For Mac users, you should be able to right click the Teams app in your toolbar to select Quit.
View Screenshot
Tabs in Teams
Tabs allow team members to access services and content in a dedicated space within a channel or in a chat. Owners and team members can add tabs to a channel, private chat, and group chat to help integrate their cloud services.
Default Tabs
Every channel comes with two default tabs: Posts tabs provide a dedicated space for conversations in a channel, and the Shared tab is where you upload, create, and share all the files pertinent to that channel.
Learn more about Posts and Shared features by selecting on the respective links in the left navigation.
Additional Tabs
- Additional tabs can be created to quickly access apps or data.
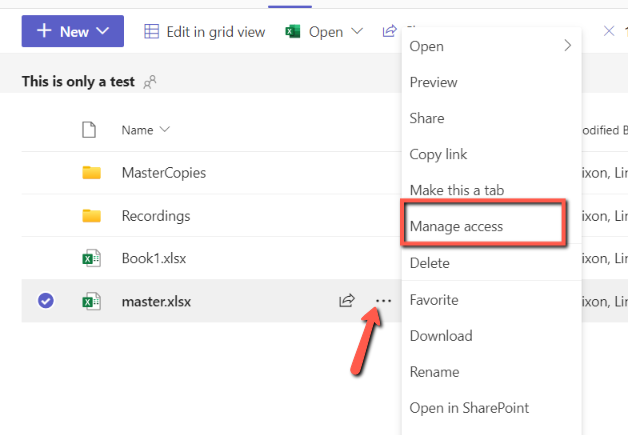
- If you want to create a tab for a PDF, Excel, Word, or PowerPoint, the files must be uploaded to your channel's Shared area before they can be converted to a new tab. Select the file, then select Make this a tab.
View Screenshot
If you don't see Make this a tab in your menu, select the More options icon (3 dots) in the menu.
Create a New Tab
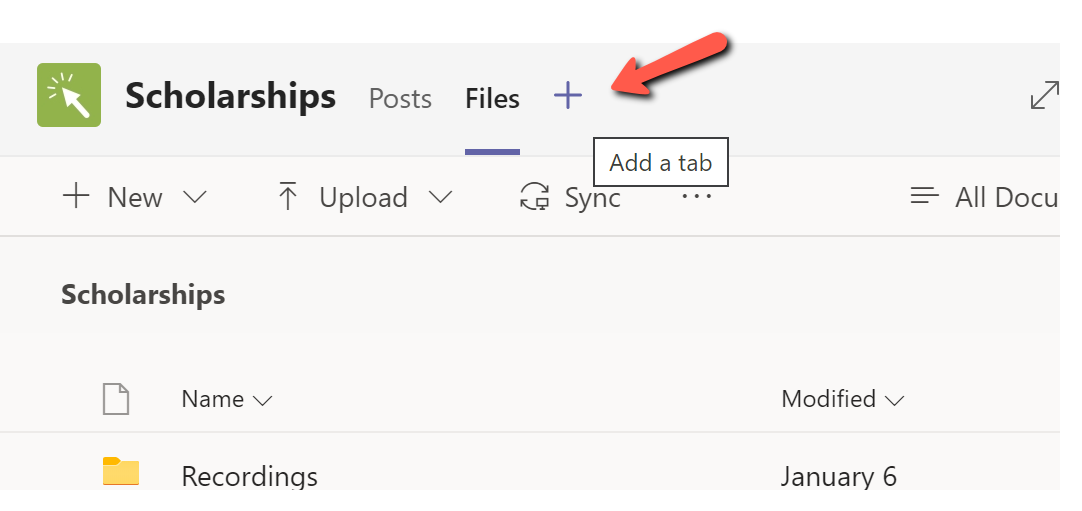
- Open the channel and select the + Add a tab icon located at the top of your screen to the right of your default tabs.
View ScreenshotTo add a tab, select the plus sign to the right of your Posts and Files tabs. - Choose from the available apps and connectors within Teams, such as OneNote, Tasks by Planner, Forms, etc.
Important Note
There are supported and unsupported apps available in the tabs area. Unsupported apps generally require a registration, privacy policy agreement, and can sometimes come with a price. Although you are welcome to use these apps, KU IT does not offer technical support for them. Adobe is an exception since we have purchased licenses for Adobe products. If you need technical assistance, you will need to contact the company. Additionally, please read the privacy policy carefully when integrating a third party app to your team.
The top apps under Recent are KU supported and most of those listed under More tabs are third party.
Common Integrated Apps
Find more information on the following common Microsoft apps: Planner, Forms, and Bookings.
Channel Calendar App
Teams Channel calendars show all your channel meetings in one organized view. Any member or owner on the team can view and add meetings to the calendar, as well as join the channel meetings.
Add a Calendar to Your Channel
- Select the +plus sign in your tabs area to add a tab.
- Choose Channel calendar.
- Select Add.
- Provide a name for your calendar.
- Select Add.
Notes
- Any team member can schedule a meeting as you normally do through the Meetings tool or in the Channel calendar app and it will show in the calendar.
- See all scheduled channel meetings in one place.
- Scheduled meetings notifications will show in channel feed.
Limitations
- The meetings do not consistently sync with your Outlook calendar except for those you add to the Add required attendees field.
- Guests cannot access the calendar app.
- One calendar per channel.
- No list of channel calendars anywhere.
- Not available in private channels.
- No SharePoint calendar integration.
Meetings
Navigate to a different page to view all Teams Meetings instructions. The following features are covered:
- Schedule a Teams meeting, webinar or town hall
- Manage More Options
- Join Meetings
- In-meeting controls
- Spotlights
- Breakout Rooms
- Polls in Teams
- Recordings
- Attendance, files, and links
Clear Cache for Tech Issues
As Microsoft Teams usage increases on campus, we're seeing more incidents of people with login issues, slowdowns, or other errors. In many cases clearing the cache will resolve these problems.
Microsoft's Support page: Instructions to clear cache on a PC and Mac
If using a PC, the instructions you need is for New Teams, not Classic Teams.
If you prefer, you can contact your tech support staff to assist you.
Teams with Courses
Instructors can use Teams to complement their courses. Education Technology staff has expertise in best practices and recommendations for how it should and should not used.
Support
Technical Support: ithelpdesk@ku.edu | 785-864-8080
Training Support: training@ku.edu | 785-864-5155