Planner
Overview
Planner is a web-based tool designed to create, assign, and oversee delegated tasks. Planner can be used on its own or it can be integrated with other Microsoft products, so owners in Microsoft Teams and SharePoint can create plans within those applications.
Planner vs. To Do
What’s the difference between To Do and Planner? How do I know which one to use?
To Do is for Personal Tasks
Microsoft To Do is a personal task management app in Outlook that helps you stay organized.
- Create daily and/or ongoing tasks
- Organize tasks in list and categories
- Integrates with Outlook and Teams
- Attach files to task
- Can view flagged emails as tasks
- Can also view Planner tasks in To Do app
- Can share list with others to have them items
Planner is for Group Work
- Create tasks and assign to those who are members of the Plan
- Can organize into buckets (categories)
- Card view, calendar view, and progress status
- Attach files to tasks
- Task reminders are emailed to the assigned member
- Integrates with Outlook and Teams
How to Access Planner
You can access Planner from the Office 365 landing page, Microsoft Teams, and SharePoint.
From Microsoft 365 landing page
- Go to Microsoft 365 landing page and log-in using your user ID an password.
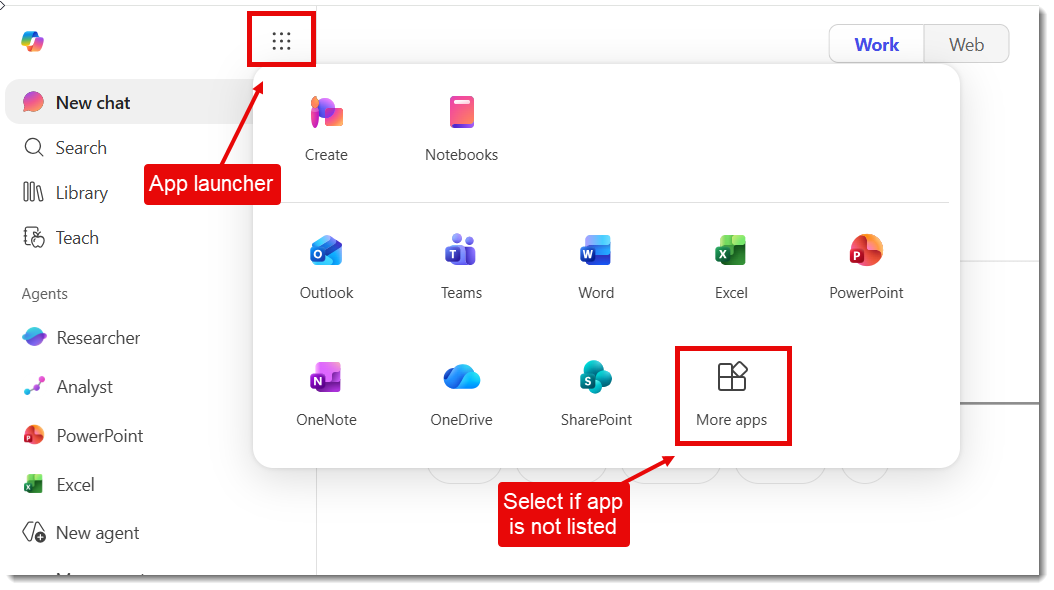
- Select the App launcher "waffle" icon from the top of the left menu, then select More Apps at the bottom right of the window.
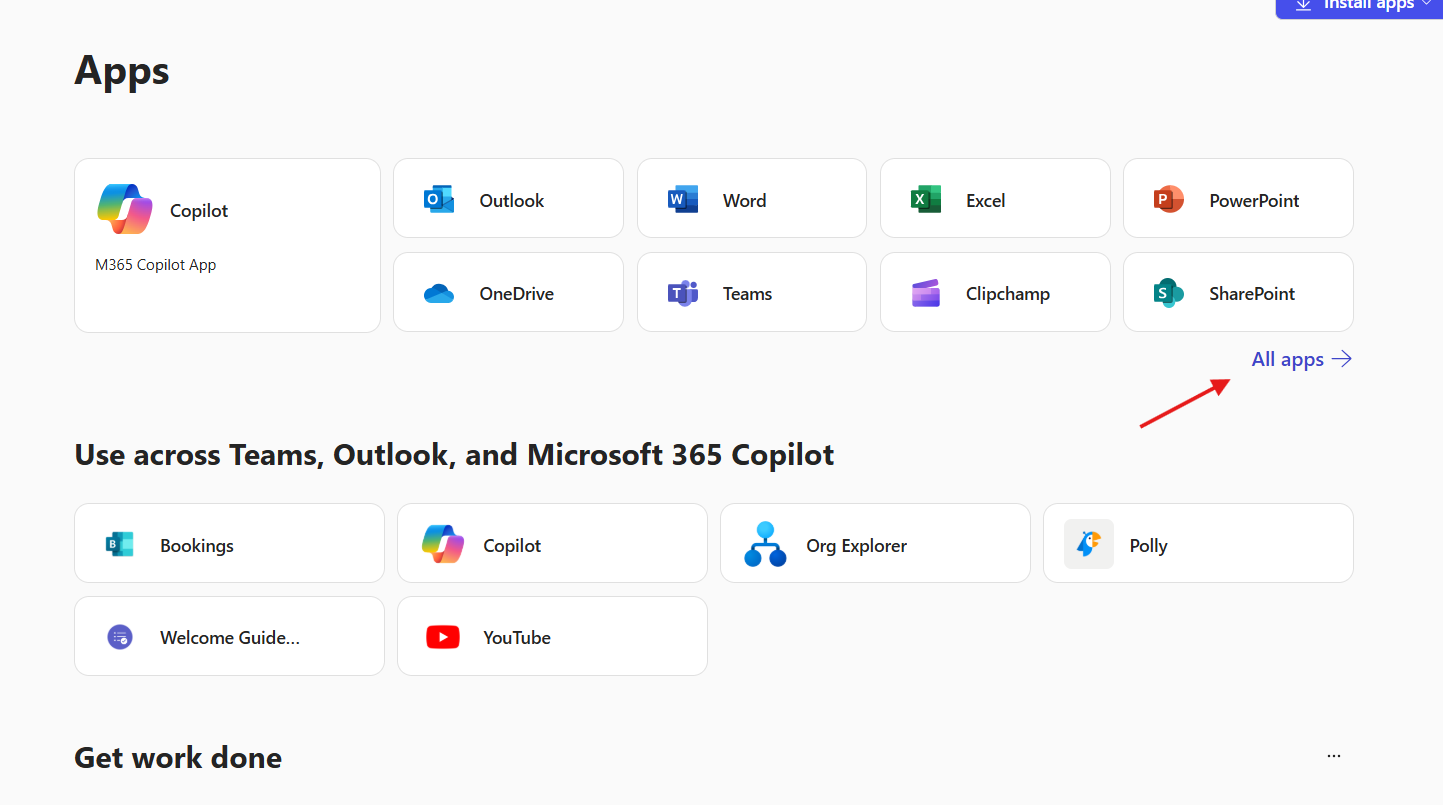
View ScreenshotSelect All apps at bottom right area of window. - Select the Planner tile from the display of apps, which are in alphabetical order. You may need to scroll to the bottom of this page to see additional apps.
Select Planner icon from left edge or choose All apps icon at the bottom to open an alternate view.
From Teams
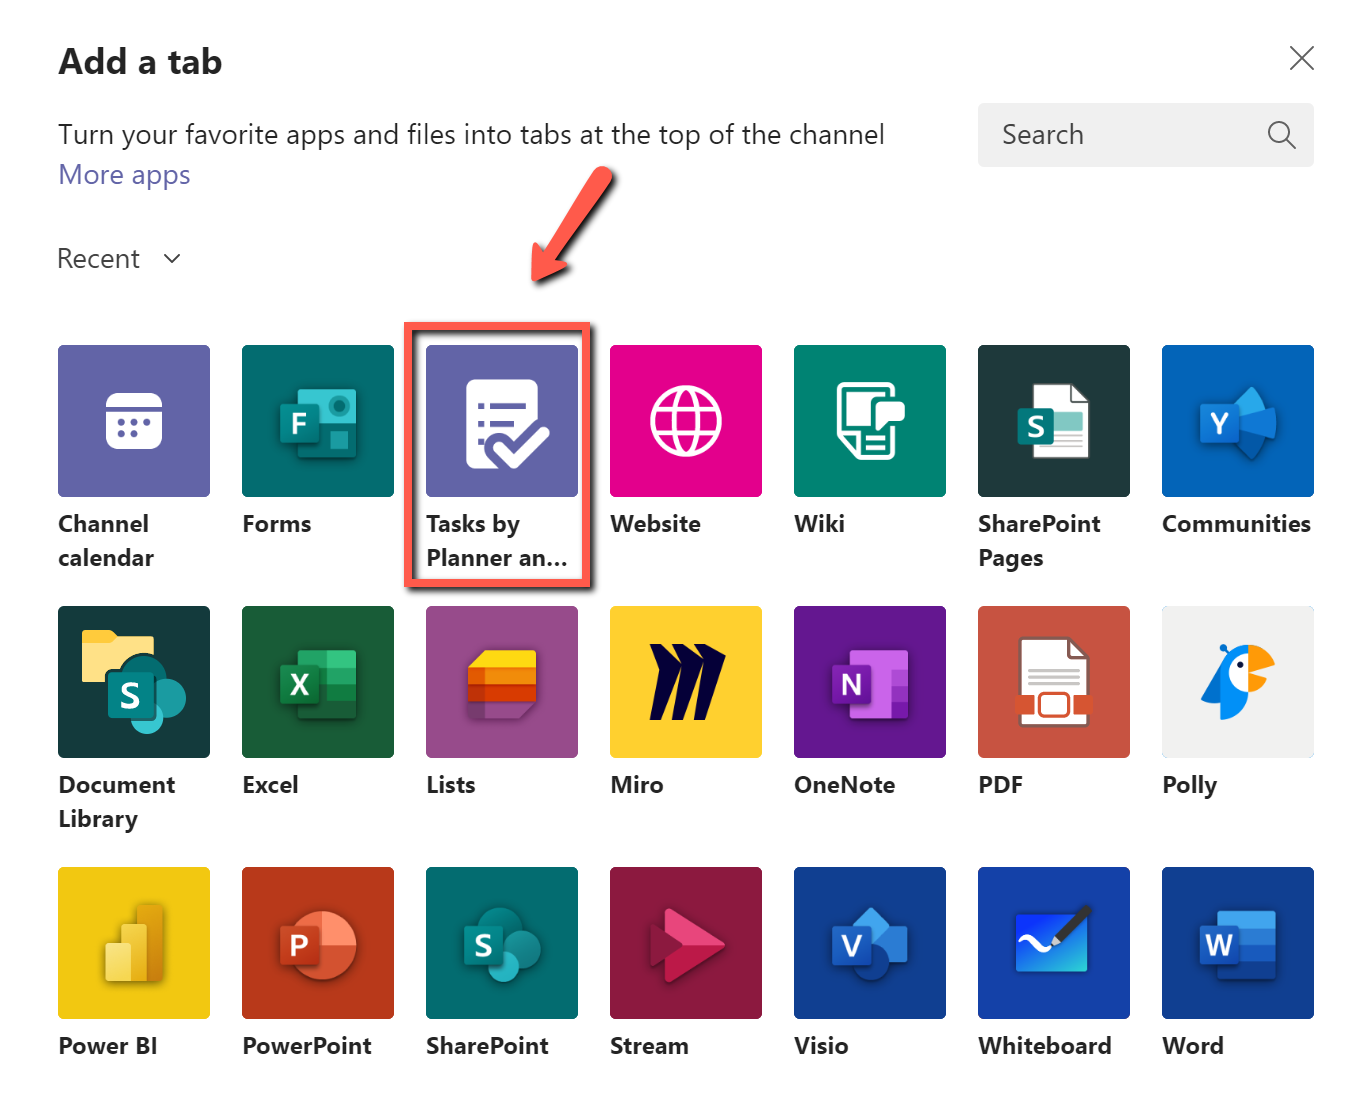
- Select the add sign + in the tabs area.
- Choose Planner from the list of apps.
You can view all of your Planner and To Dos in Teams.
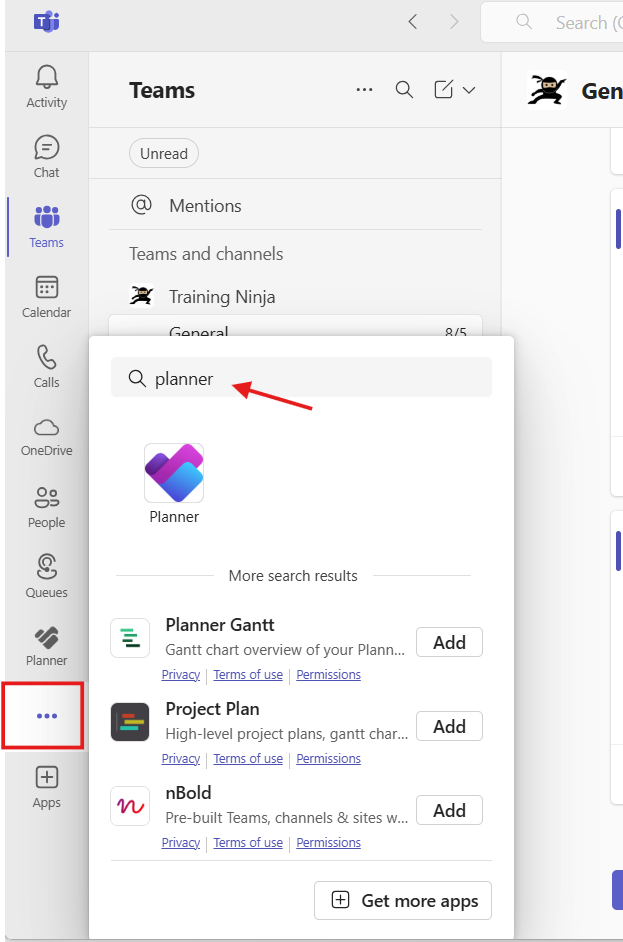
- Select the More options [...] in the left apps bar.
- Select Planner.
- If Planner is not showing, you can begin typing in the search field to find.
View ScreenshotSelect 3 dots in left app bar to bring up Tasks by Planner and To Dos.
This will bring up all of your tasks and to dos you created in Outlook, Teams, Planner, etc.
From SharePoint
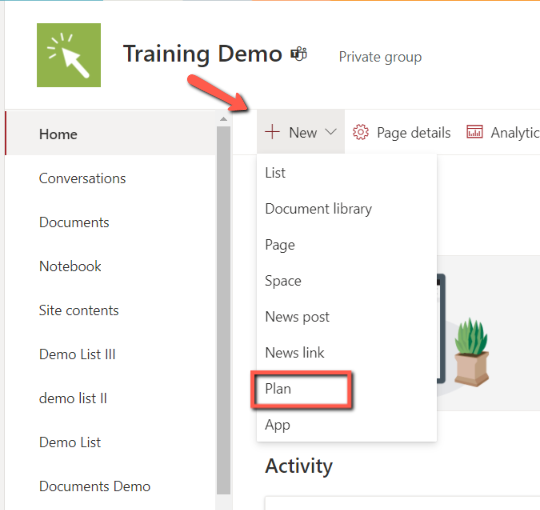
- Select Edit from the top-right area of the menu.
- Search for and choose Plan. Select New in the menu, then Plan from the panel.
Add Tasks
Once you have created a plan, select Add task. From here, you can create task name, set due date, assign a person/people to the task. If the Plan is integrated with Teams or SharePoint, only those in the Office 365 group will be added to the Plan.
For additional options, select on the task card to expand.
- Options include change bucket lists, progress, priority, notes, attachments, comments.
- Add checklist items: In expanded card under Checklist, select Add an item to rename > press the return key. If you want to view and manage the checklist on the outside of the card, select Show on card.
Add Labels
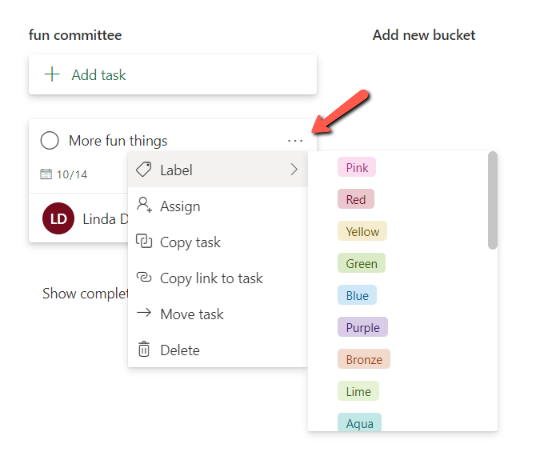
Colored labels can be assigned an show on the outside of the card for easy designation. You cannot get to the labels from the expanded card, so start from the condensed card.
- Hover over card and select the More options [...] in the top right corner.
- Select Label.
- Selected a color.
View ScreenshotSelect 3 dots on top corner of card, select label, then choose color. - Once the color appears on card, double click the card to expand.
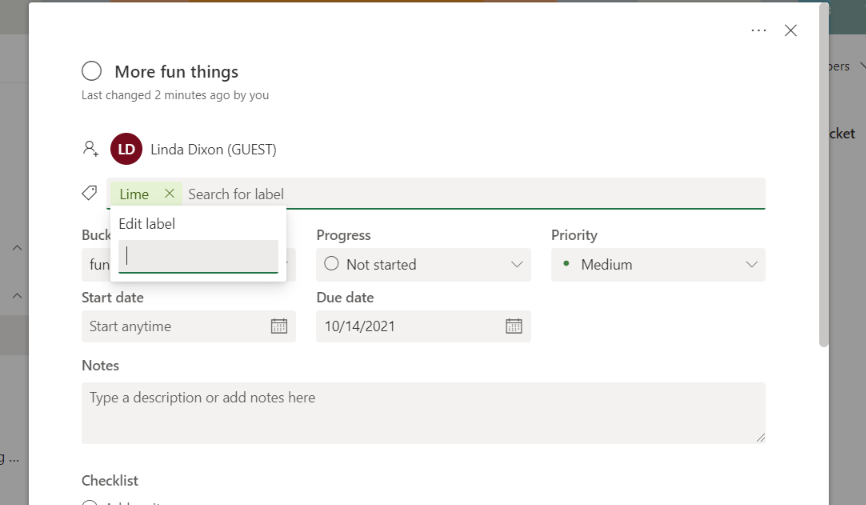
- To give your label a name, select the color you want to rename.
View ScreenshotSelect label and enter new name in field.
Remove and Delete Plans
Remove a Plan from the Planner app
Note: Deleting a plan will delete all tasks and contents associated with the Plan and cannot be restored.
- Go to Microsoft 365 landing page and log-in using your user ID an password.
- Select the App launcher "waffle" icon from the top of the left menu, then select More Apps at the bottom right of the window.
View ScreenshotSelect All apps at bottom right area of window. - Select the Planner app.
- Choose the plan you want to delete.
- From the top menu to the right of Schedule, select ellipses […] to reveal a dropdown menu.
View ScreenshotSelect 3 dots on top menu, select Plan settings. - Select Plan Settings.
- Select Delete this plan in small print at bottom of Settings panel.
View ScreenshotSelect label and enter new name in field. - Select the box to show you understand you will lose all content associated with this Plan.
- Select Delete.
Remove a Planner Tab from Teams
To remove the Planner tab
- Select the tab.
- Select the down arrow to reveal the menu.
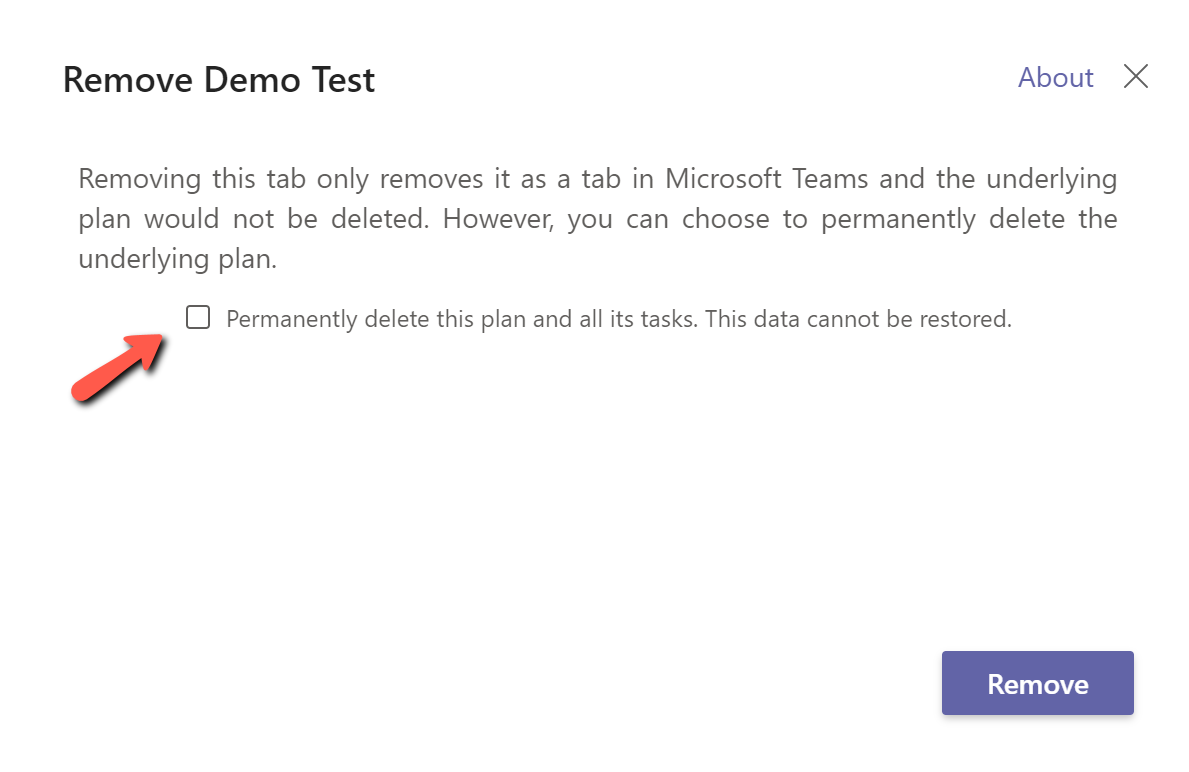
- Select Remove, then select Remove from the next window.
To permanently delete the plan with all associated tasks, select the box, then select Remove.
View ScreenshotTo permanently delete a Plan, select the checkbox, then the Remove button.
Remove a Plan from SharePoint
Currently, the only way to delete a plan created from SharePoint is through the Planner app.
Additional Tools
- Filter: You can manage your tasks through the Filter and Group by Bucket filters at the top-right of your screen.
- Schedules: At the top-left of your screen, you have tools that will give you a view of the progress of the tasks you manage as well as see a calendar view of due dates for all of the tasks you assigned.
- Charts: View the progress of tasks at a glance.
Add a Plan to Outlook Calendar
Add a Plan to Outlook
You can add a plan to your Outlook your calendar, which will show under Other Calendar in the left pane:
- Open the your plan from the Planner app on the office365 landing page at office365.ku.edu.
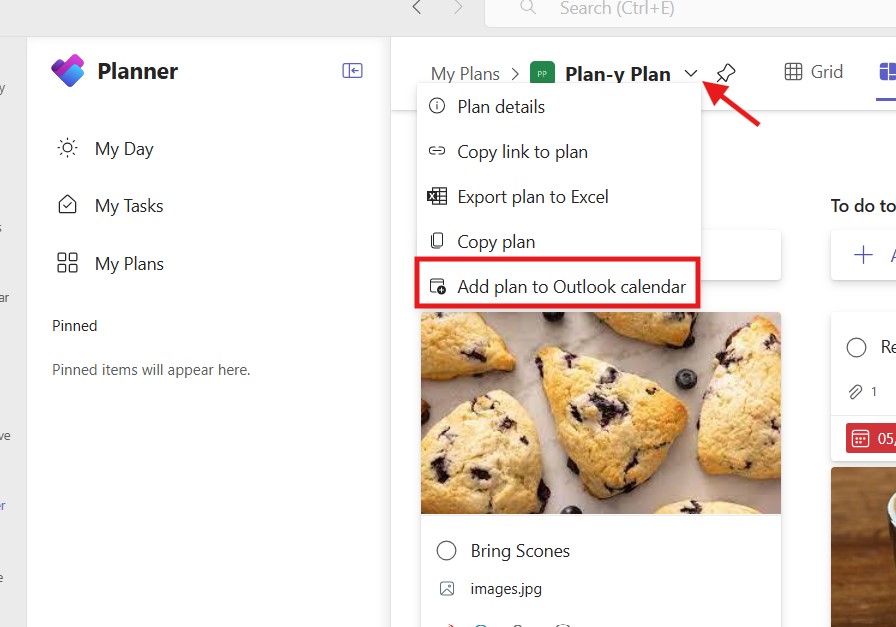
- Select the More options [...] in the top menu to the right of Schedule.
- Select Add plan to Outlook calendar.
View ScreenshotSelect 3 dots on top menu, select Add plan to Outlook calendar. - Select the radio button next to Publish, then select Add to Outlook.
View ScreenshotChoose Publish, then select Add to Outlook about the link field.
Remove plan from Outlook
To remove a plan from your Outlook calendar, follow the steps above, but select the radio button next to Don't publish, keep private.
NOTE: There is typically a delay in new tasks populating to the Outlook calendar.
Support
Technical Support: ithelpdesk@ku.edu | 785-864-8080
Schedule an Overview or Training Support: training@ku.edu | 785-864-5155