Scheduling Polls
Overview
Use the Scheduling Poll feature in Outlook to quickly arrange meeting times with multiple attendees to minimize back-and-forth emails. Attendees select times that work for them, have the can select preferred times, add additional attendees, and offer optional times.
Once all attendees have made their choices, Outlook automatically creates a meeting based on these selections and adds it to everyone’s calendar. If you prefer, you can disable this automated feature and manually select the date and time once the poll is completed.
Access Scheduling Polls
PC Users
To bring up the Scheduling Poll in the Outlook desktop app:
- Create a new message and ensure you have added at least one attendee. You can also create a meeting invitation from your calendar.
- Select Scheduling Poll from your tools ribbon.
View Screenshot
Mac Users
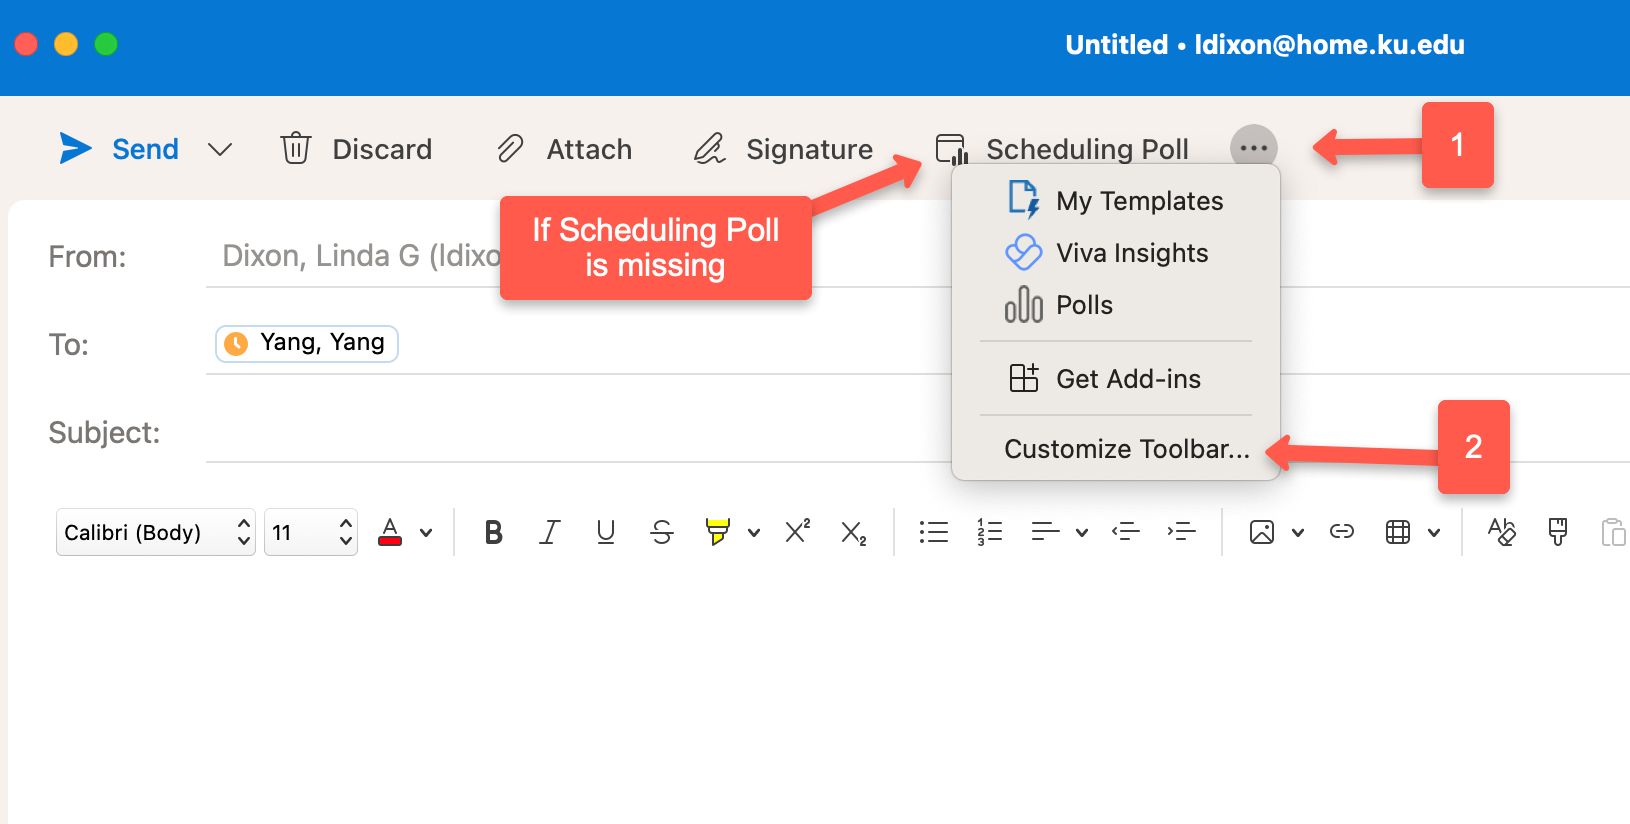
When you create a new message, you should see the Scheduling Poll in the top menu of the message window. If you are not seeing option:
- Click on the three dots to the right of your message’s menu items.
- Select Customize Toolbar.
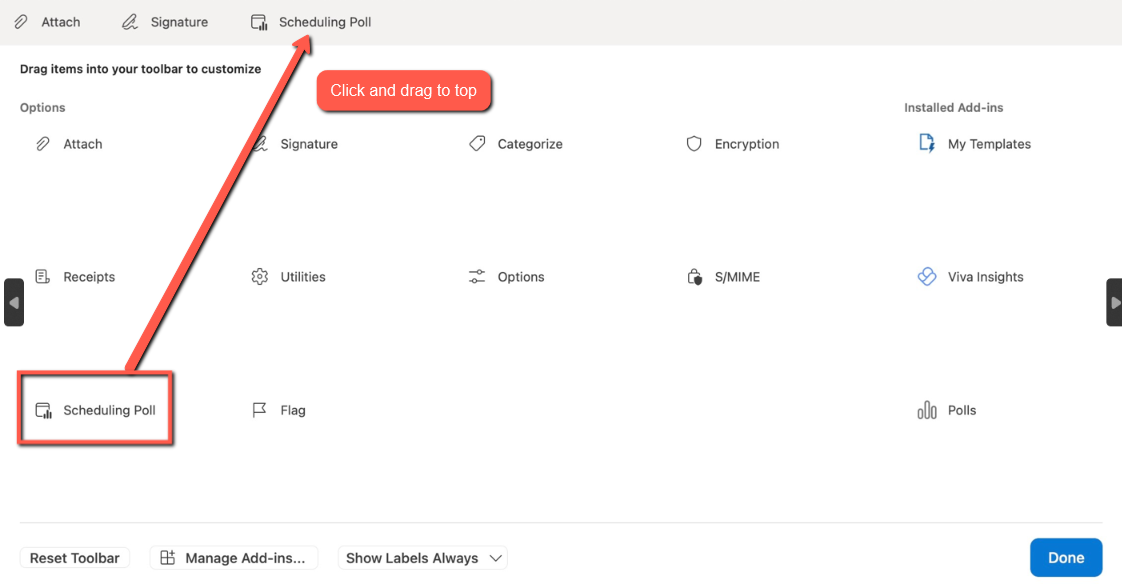
View Screenshot - Click and drag the Scheduling Poll option to the top menu.
View Screenshot - Select Done at the bottom-right.
From your message, ensure you have added attendees, then select Scheduling Poll from the top menu of your message to add as a panel to the right.
Outlook for the Web
To bring up the Scheduling Poll in Outlook for the web:
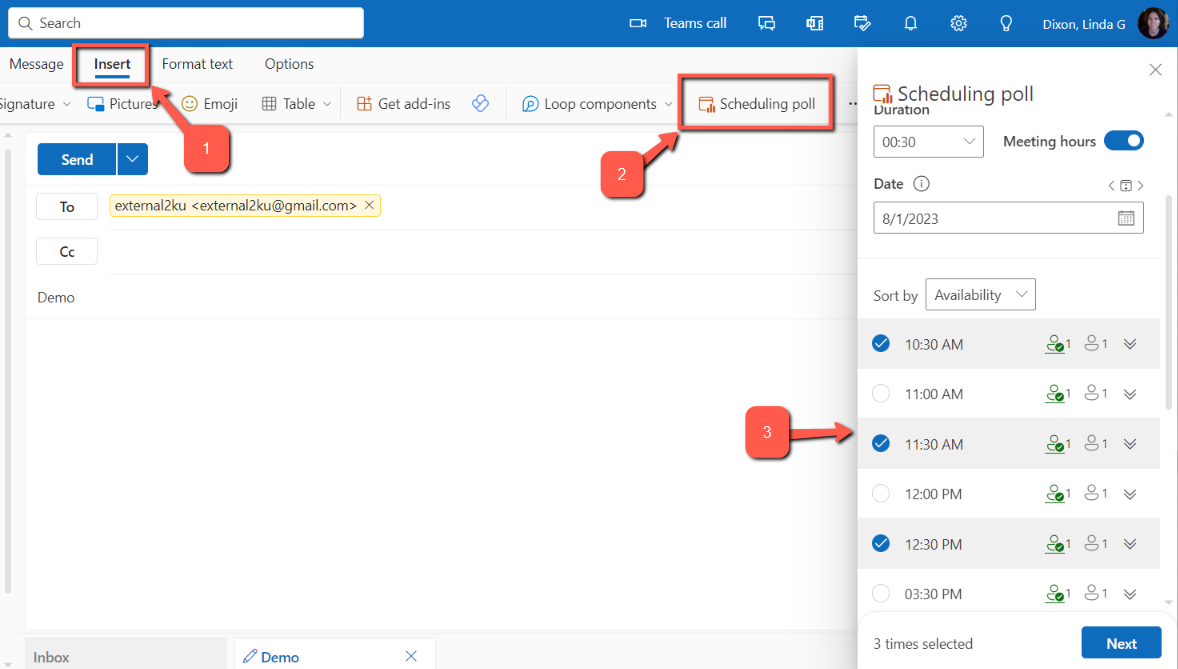
- Create a new message and ensure you have added at least one attendee. You can also create a meeting invitation from your calendar.
- If you don't see the Scheduling Poll option, open the Insert tab from the top menu.
- Select Scheduling Poll from your tools ribbon.
View Screenshot
Create a Scheduling Poll
- Once Scheduling Polls is showing as a panel to the left of your interface, make appropriate selections:
- View all of your polls – manage all polls you’ve created from here.
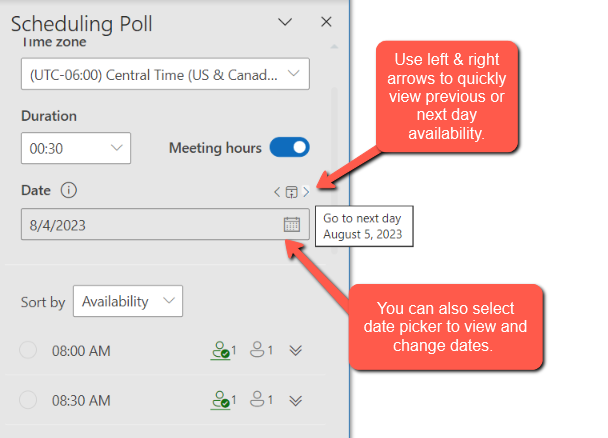
- Time zone - Your time zone is set by admins, but you can select a different one if necessary.
- Choose meeting duration.
- Meeting hours – Toggled on will show only times during working hours. To show 24/7 and weekends, toggle the switch off.
- Choose a date – Use date picker to see that date’s availability or use arrows to view next or previous day’s availability. After you’ve chosen times, you can go back to add additional dates and new times, if needed.
View Screenshot
- Select the Next button at bottom of the panel to bring up location, Teams meeting link, and Manage poll settings.
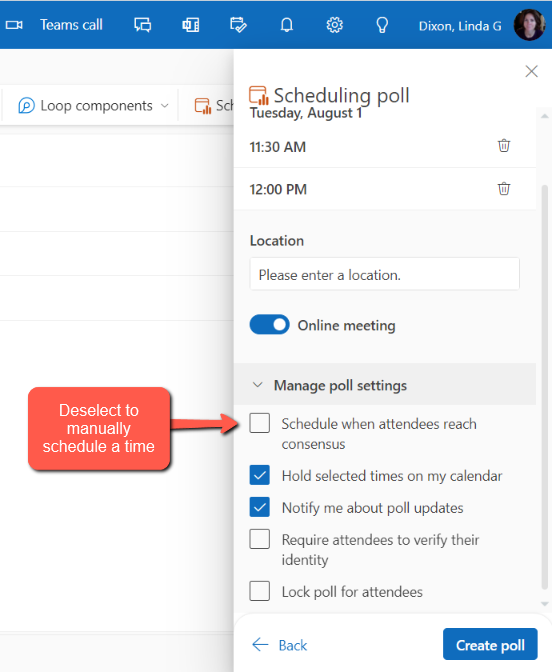
- Open Manage poll settings in the panel to manage other options:
- Schedule when attendees reach consensus. See Auto Scheduling below
- Hold tentative times on my calendar – If selected, each proposed date and times will be added to the organizer’s Outlook calendar as tentative meetings until a final time is selected. Deselect the box next to this option to disable this feature.
- Notify me about poll updates – You’ll receive an email each time an attendee votes.
- Require attendees to verify their identity.
- Lock poll for attendees – once attendees make their selections they cannot go back to make changes.
View Screenshot
- Select the Create Poll button at bottom of panel.
Manage Auto Scheduling
Auto scheduling is set up by default, which means the Outlook will find a voting consensus and automatically schedule a time for the group. If you want to stop the automated process to schedule manually, see step 6 above to go to Manual Poll Settings to deselect Schedule when attendees reach consensus.
View Screenshot
See Microsoft's support page for more information on Auto Scheduling rules.
Attendee View
As an attendee, you will receive an email with a Vote button that takes them to the available times and dates provided by the organizer.
Preference Selection
- Select the Vote button.
- Select your email from list of Attendees.
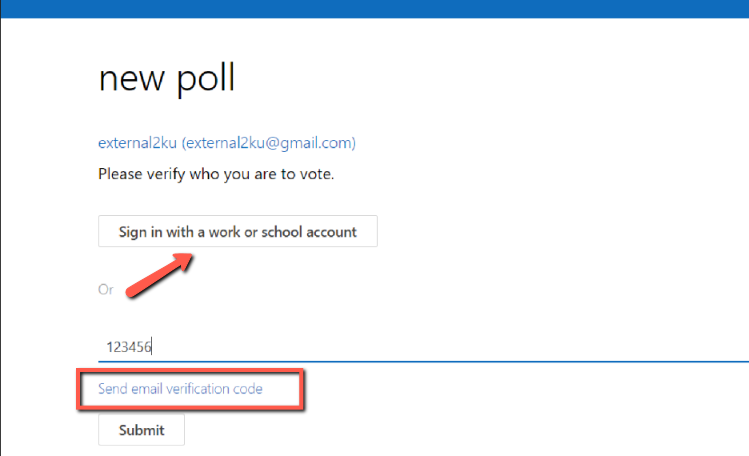
- If the organizer has selected has required verification, you will need to sign in with your KU credentials or request a code to be sent to the email used to send the meeting invitation.
View Screenshot - Select buttons to indicate Yes, No, or a preferred time. You can also add additional required / optional attendees or propose another time from here.
Once a time has been selected, you will receive an email invitation to the meeting.
Support
Technical Support: ithelpdesk@ku.edu | 785-864-8080
Training Support: training@ku.edu | 785-864-5155