Perceptive Content/Experience
Overview
Perceptive Experience is the web version of Perceptive Content (formally ImageNow). You can use any browser to access Perceptive Experience. You can use Perceptive Experience in place of the Perceptive Content Client for most features. If you use a Mac, you must use Perceptive Experience.
Perceptive Content Client is installed to your desktop. If you scan, use the ImageNow Printer, or link documents using Application Plans, you will need to use the Perceptive Content Client. Contact your Technology Support staff if you need the Perceptive Content Client installed.
Log-in
- Log in to Perceptive Experience using your KU Online ID and password.
- Select either the Documents or Workflow icon to begin working with your documents and folders.
Notes:
- If you're not already using Perceptive Content, but would like more information on how to leverage it, create a TDX ticket for assistance.
- Access to Perceptive Content is role-based and you will only see documents and settings that have been assigned to you.
- You must be on the KU network to use Perceptive Experience or the Perceptive Content Client. If you are off campus, you must be on the KU Anywhere VPN. Please refer to these instructions for VPN access or Technology Support staff at 785-864-8080.
Document Retrieval
Search
Search Using Existing Filters
- Select the Documents icon from the homepage
- Select a view from the list of Document Views.
- Select the arrow next to the view to see available filters.
- To apply a filter, select from the list of filters.
- Enter your Criteria.
- Select OK.
Build Your Own Search
- Click in the Search in All Documents window.
- Select one of the field parameters.
- Select an operator.
- Type or select a search parameter.
- Select Add to add the constraint.
- Select Search.
Notes:
- Constraints that have not been run are outlined with a dashed border.
- To edit, select the constraint.
- You can create multiple constraints to search.
Navigate
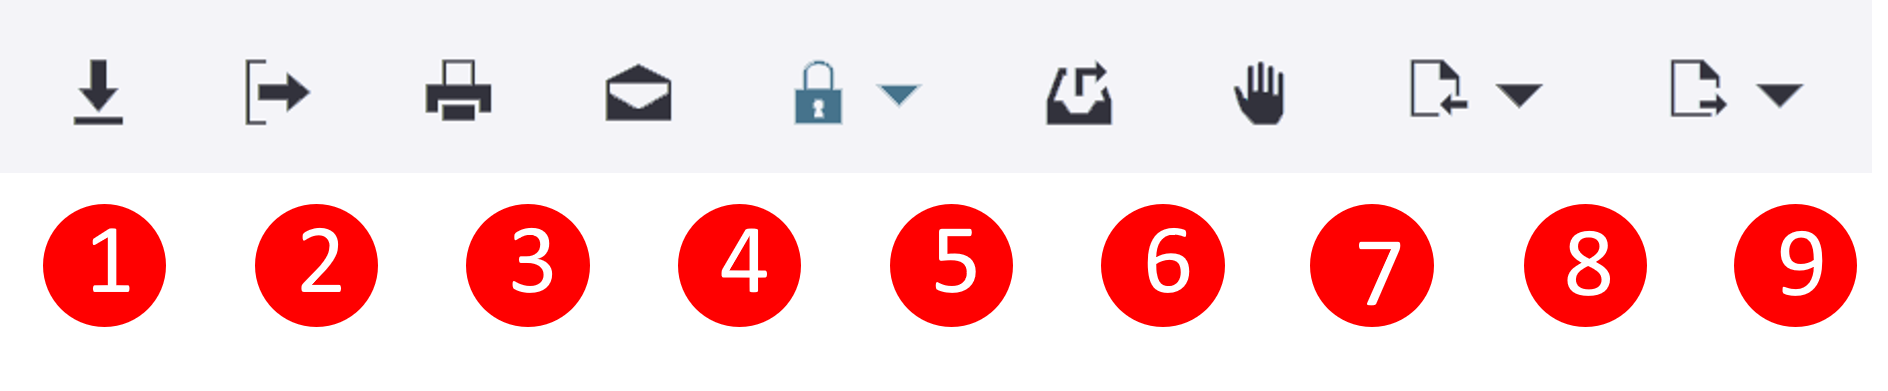
Once you open the Documents section of Experience, you can use the following toolbar to start working with your files.
Notes:
- Settings and options will vary depending on your access.
- This toolbar is only visible after selecting a file(s) from your search using one of the methods.

- Show or hide views list.
- Download document
- Export to PDF
- Print document.
- Email document
- Version control. Note: This option will be greyed out in most cases.
- Move content
- Add to Workflow
- Open in Workflow
- Remove from Workflow
Open and View Documents
View/Open a Document
- Search for document criteria.
- Select the document you want to open from the displayed list.
Navigate
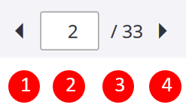
- Previous page.
- Current page (optionally type a specific page number in this box)
- Total number of pages.
- Next page.
Document Views & Panels
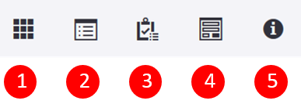
- Show/Hide page thumbnails
- Show/Hide Related Documents.
- Show/Hide Related Tasks.
- Show/Hide Forms.
- Show/Hide Properties.
Work with Pages
Page Options

- Back to Documents list
- Save document
- Create a task
- Annotate page (will only how for .tiff files)
- Add a page
- Download document
- Export to PDF
- Send in email
- Add to Workflow
Add a Page
- Search for document criteria.
- Select the document you want to open from the list.
- Select Add Page.
- Choose the new page’s location.
- Choose the capture source.
- Select Done.
- Browse to and select a file (if applicable).
- Select Done.
- Select Save.
Delete a Page
- Select a page from the Page Thumbnails pane.
- Select Delete.
Notes:
- Once a page is deleted, it cannot be restored.
- You need access to delete pages.
Send in Email
- Select the page or document.
- Select Send email.
- Enter the recipient's email address.
Notes:
- This can be done at the page or document level.
- When selecting an item from the document list, select the check box that appears next to the item name to view the toolbar.
Add to Workflow
- Open or view a document.
- Select Add to workflow.
- Select a workflow process.
- Select a queue.
- Select a priority.
- Select Add or Cancel to quit.
Open in Workflow
The document must already be added to a workflow before opening.
- Select or open a document.
- Select Open in Workflow.
Workflow
Search for Workflows
- Select the Workflow icon.
- Select a workflow from the list of Workflow Processes.
- Click into the Search window.
- Select one of the field parameters.
- Select an operator.
- Type or select a search parameter.
- Select Add to add the constraint.
- Select Search.
Notes:
- Constraints outlined with a dashed border have not run
- To edit, select the constraint.
- You can create multiple constraints to search.
Navigate
Once you open the Workflows section of Experience, you can use the following toolbar to start working with your files.
Notes:
- Settings and options will vary depending on your access.
- This toolbar is only visible after selecting a file(s) from your search using one of the methods.
- Download document
- Export to PDF
- Print document
- Email document
- Version control (note: This option will be greyed out in most cases)
- Remove from Workflow
- Apply Workflow hold
- Route Back
- Route Forward
Open and View Documents
- Search for document criteria.
- Select the document you want to open from the displayed list.
Navigate
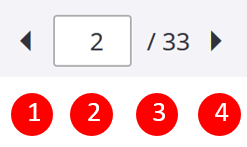
- Previous page.
- Current page (optionally type a specific page number in this box)
- Total number of pages.
- Next page.
Document Views & Panels

- Show/Hide page thumbnails
- Show/Hide Related Documents.
- Show/Hide Related Tasks.
- Show/Hide Forms.
- Show/Hide Properties.
Work with Pages

- Back to Documents list
- Save document
- Create a task
- Annotate page (will only show for tiff files)
- Add a page
- Download document
- Export to PDF
- Send in email
- Remove from Workflow
- Apply workflow hold
- Route back
- Route forward
Add Annotations
- Select the annotation icon.
- Select Create Annotations (tiff files only).
- Click on the page where you want to place the annotation.
- Choose an annotation type.
- Choose an annotation template.
Add a Page
- Search for document criteria.
- Select the document you want to open from the list.
- Select Add Page.
- Choose the new page’s location.
- Choose the capture source.
- Select Done.
- Browse to and select a file (if applicable).
- Select Done.
- Select Save.
Delete a Page
- Select a page from the Page Thumbnails pane.
- Select Delete.
Notes:
- Once a page is deleted, it cannot be restored.
- You need access to delete pages.
Send in Email
- Select the page or document.
- Select Send email.
- Enter the recipient's email address.
Notes:
- This can be done at the page or document level.
- When selecting an item from the document list, select the check box that appears next to the item name to view the toolbar.
Workflow Options
Route a Workflow Queue Item
- Open the workflow queue item.
- Complete one of the following actions:
- Route Forward sends the document or folder to the next queue in the workflow process.
- If more than one queue is available, select the route icon next to Route Forward and choose the desired option.
- Route Back sends the document or folder back to the previous queue
- To send back to any queue, select the route icon next to Route Back then choose the desired option.
- To send to any queue in the workflow process, select the route icon next to Route Forward and then select Route Anywhere. Choose the desired workflow queue.
Place Workflow Queue Item on Hold
- Open the workflow queue.
- Select the Hold icon.
- Enter or select a date.
- Select a reason for placing the queue item on hold (optional).
- Enter the reason you're applying a hold (optional).
- Select OK.
Support
General Support: Create a TDX ticket to the KU IT Perceptive support team.
Access Requests: Use the Perceptive Content Access Request Form to submit Perceptive access requests to the KU IT Perceptive support team. Use this form for any type of request related to Perceptive access, for example; add new users, change or remove access for existing users, add or remove a user from receiving emails/alerts. You can attach supporting information such as emails. The form has a search function to assist in identifying users and provide IT with information needed to complete the request.
FAQs
How do I know if I need the Perceptive Content Desktop Client installed on my workstation or can I use Perceptive Experience web version?
Perceptive Content Desktop Client is installed to your specific workstation. You will need the Client for scanning workstations, if you need to link/index or search for documents using Application Plans, if you want to use the ImageNow Printer functionality, or if you are a Power User with some management privileges. Contact the Technology Support staff to request installation of the Perceptive Content Desktop Client.
Perceptive Experience is the web version of Perceptive Content. Most individuals can use Perceptive Experience instead of installing the Perceptive Content Client to their workstation. If you use a Mac, you must use Perceptive Experience. Go to the Perceptive Experience login page and sign in with your KU Online ID and password.
You must be on the KU network to use Perceptive Experience or the Perceptive Content Client. If you are off campus, you must be on the KU Anywhere VPN. Please refer to these instructions for VPN access or Technology Support staff at 785-864-8080.
Can I access Perceptive/ImageNow when I’m away from campus?
Yes, you can access your documents even if you are at home or traveling. In order to maintain the security of your documents, you must use KU Anywhere VPN to connect to the University network before accessing documents from off-campus. The process is the same as the one used for establishing secure access to other resources on the KU network such as central file servers and departmental file servers. Click here for details regarding KU Anywhere VPN.
How can I get access to the ImageNow Printer to add documents to the system?
The ImageNow Printer is a virtual printer that captures documents into ImageNow as TIFF files using a capture profile. This functionality is included with ImageNow Client licenses. Contact your Technology Support staff to have the ImageNow Printer installed if needed.
How will system downtime and outages be communicated?
System maintenance and upgrades will typically be scheduled between 8am and noon on Sundays during the normal maintenance window. Any planned downtime or outages outside of the maintenance window will be announced to Power Users via email, who will then distribute downtime information to their users.
Upgrades and outages of enterprise systems such as PeopleSoft HR/Pay, Campus Solutions Enroll & Pay and Oracle Financials may affect Perceptive and will be communicated if needed.
How can I get access to the documents or workflow queues within ImageNow?
Use this form Perceptive Content Access Request Form to submit Perceptive access requests to the KU IT Perceptive support team. Use this form for any type of request related to Perceptive access, for example; add new users, change or remove access for existing users, add or remove a user from receiving emails/alerts. You can attach supporting information such as emails. The form has a search function to assist in identifying users and provide IT with information needed to complete the request.
Who is my Power User? What can Power Users do?
Power Users have a higher level of access within the system. They may be able to perform actions on documents that you cannot do, for example, deleting a page. Power Users also may have access to modify a View, a Capture Profile, and an Application Plan. Your manager is your first contact for functional questions. If you don't know the Power User in your department, please contact your manager or perceptivetickets@ku.edu.
I’m a new user. Are there classes I can take to learn more about the software?
How to KU includes information on Perceptive Experience Document Retrieval and Workflow. The Help system within Perceptive Client and Experience is a good reference for step-by-step instructions. Your manager may have training materials related to your specific business processes and workflow. Your manager is your first contact for functional questions. Contact perceptivetickets@ku.edu for additional resources.
I have access to lots of workflow queues, but I only really use a few of them. Can I remove those I don’t need from my view?
- First, discuss with your manager to know if your access should be changed to remove specific queues.
- If you’re using the Perceptive Content Client, use the following steps to setup the Message Center with your ‘favorite’ workflow queues. This option is not available in Perceptive Experience. From the ImageNow Toolbar, select Settings, Options. The ImageNow Options window will open. Select Toolbar - Select Message Center tab. Under Workflow Queue Status, select the workflow queues that you want to display in the Message Center. Optionally, you can set the Animation Style to Scroll and set the Scroll Rate. Click Apply, then OK. From the ImageNow Toolbar: Select Settings, Show Message Center. The workflow queues you selected will display under the Toolbar.
How can a Power User receive an email notification when something shows up in their error queue?
Power Users may request email alarms by contacting perceptivetickets@ku.edu. Please include the following information: Workflow queue, condition for generating the alarm and/or frequency of the alarm. For example, generate an email alarm for the XYZ Error queue when there are items in the queue; generate an email alarm for the XYZ Pending Info queue when items have been in the queue over 48 hours.
What do I do if my Application Plan is not working?
Application Plans can be impacted by operating system upgrades, browser upgrades, or upgrades to the business application (HR/Pay). Contact your Technology Support staff in your department. The technician can compare your workstation to someone else who is not having the issue.
If your technical staff cannot solve the issue, contact perceptivetickets@ku.edu.
How can I increase the font size?
Perceptive Content/ImageNow Client:
- Log into the client.
- Within the Viewer, click File, and then click Options.
- Select Grid Appearance.
- Select the Table and Header font and size you need.
- Click Apply.
- Click OK to save.
Perceptive Experience:
- Log into Experience.
- Use the settings tools in your specific browser to change/customize font size. This is usually a Zoom function where you can increase or decrease.
How can I print information contained in eForms, such as Position Descriptions?
It is not recommended to print hard copies of records from the system. But in some cases, capturing a screen print or printing a hard copy are necessary. Use the print button in the application toolbar, not the print option in your browser. Printing to PDF file is a good solution for reducing paper waste and if you need to have a PDF printer option installed on your computer please contact your Technology Support staff.