Kaltura
Overview
With Kaltura you can schedule automatic recordings of lectures or presentations or create ad hoc recordings. This powerful tool can be used for review, to supplement materials covered in class, or to provide instruction that is entirely web-based. The captured recordings can be viewed via a web browser and/or can be downloaded to a computer or mobile device. You can create both classroom recordings and personal recordings using your computer, microphone/webcam.
Create a Recording
- Log into the classroom workstation using your KU username and password.
- Double-click on the Kaltura Classroom icon from the desktop.
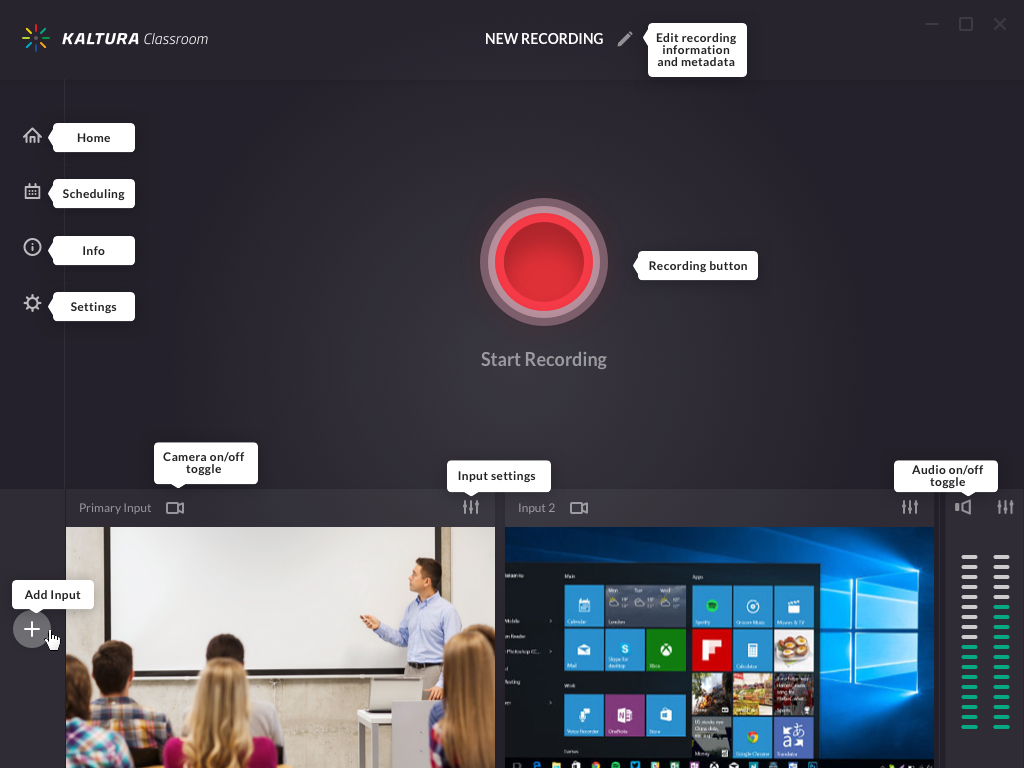
View ScreenshotKaltura logo. - Click on the Edit button to add a title and description to your recording.
View ScreenshotSelect the pencil icon to edit. - Type and select your KU Online ID in the username field (required).
- Confirm your audio and video settings.
Note: Toggle video, audio and screen sharing on and off by using the Camera, Audio and Input icons
View ScreenshotManage audio and video toggles and sliders. - Select the red Start Recording button.
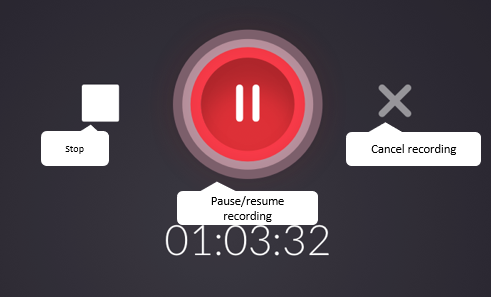
Note: A countdown will begin after you select Start recording. Once the countdown is over, your recording has begun. You can minimize the Kaltura Classroom application while recording. - You can pause and restart the recording at any time by pressing the red recording button.
- Select the square Stop button to end the recording.
View ScreenshotSelect the white square button to the left of record button to stop recording. - Enter or change the recording details as needed.
- Select Save.
Schedule Recording
When you work with the Media Production Studio (MPS) or your local tech support staff to schedule classroom recordings, your recordings will start automatically at their scheduled time. In most cases, the recordings will be delivered automatically to the Course Gallery in your Canvas course once transcoding is complete.
- Go to and fill out the lecture capture request form.
- After you submit the form, Media Production Studio staff will contact you to gather additional details.
Edit Recordings
- Go to MediaHub.
- Log in using your KU Online ID and password.
- Click on the recording’s title
Note: Recordings will be available after transcoding is complete. - Click on Actions.
- Choose Launch Editor.
- An HTML5 Editor will launch where you can trim the video or remove content segments.
- Use the brackets to trim parts of the video.
- Use the scissors to remove segments of the video.
 - Select Save to replace the original recording. Or Save a Copy to create a new entry with your edits.
Note: We recommend choosing Save a Copy, as it preserves the original recording and the video is available much quicker when you make a new entry.
Share a Recording
View and Share a MediaHub Link
No matter how you record with Kaltura Classroom, you can access all recordings through MediaHub at any time.
- Go to MediaHub.
- Log in with your KU Username and password.
- Select the title of the recording.
- Select the Share tab.
- Copy and paste the media link or use the embed code to embed media on a page.
Additional information:
Students Access Recordings
Your instructor has chosen to use Kaltura Classroom to deliver recordings of review sessions, classes, or more. Depending on how your instructor chooses to deliver content in the course, you may either find recordings in the Course Gallery, or through-out the course content as accessible links.
In Canvas
Support
| Resource or Department | Contact Information |
|---|---|
| Media Production Studio | itmps@ku.edu | 785-864-6452 | Budig 10 |
| Media Hub | MediaHub |
| Canvas | itedtech@ku.edu | 785-864-2600 | Budig 4 | Canvas Help |
| KU IT Help Desk | ithelpdesk@ku.edu | 785-864-8080 | 3rd floor Anschutz Library |