Microsoft Bookings
Overview
Microsoft Bookings is an online scheduling service in Microsoft 365 that allows users to make online appointments with you and your team. Bookings syncs with your Outlook calendar to ensure only available times can be chosen, and appointments automatically populate on your calendar.
Getting Started
Two ways to get to Bookings:
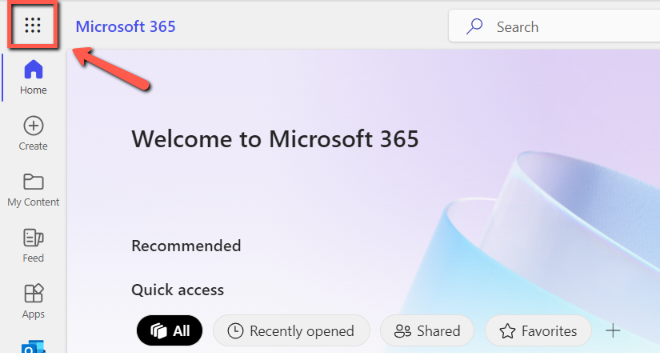
- Sign in to office365.ku.edu and select the App Launcher (waffle icon) in the top-left.
View Screenshot - Select Bookings icon at left edge of screen or select All apps at the bottom for another view of all apps.
View Screenshot - Go to bookings.office.com and sign in with your KU credentials.
First time accessing Bookings:
- Select Get it now, then fill in your "business" name with your department, center, organization or your name if the Booking page is just for you. The name you choose for your Booking page will also be the URL, so consider a short, but descriptive title.
- Provide a name and optional description.
- Select Continue > OK.
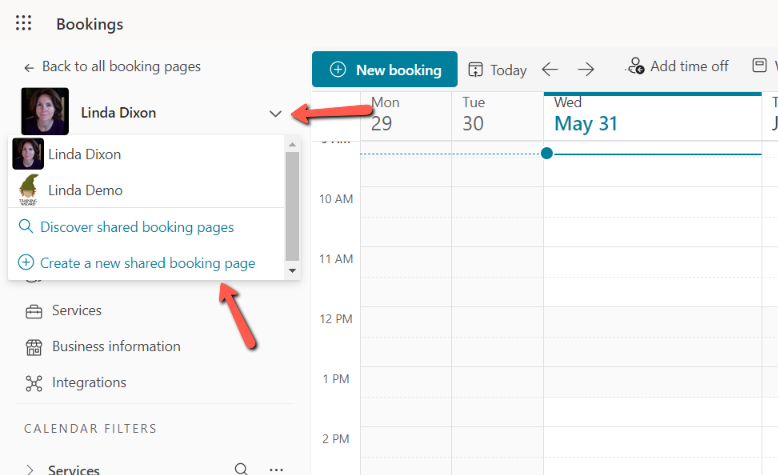
To create additional, new Bookings pages, go to space below the logo at the top-left, select the down arrow, then select Create a new shared booking page to create new Bookings page for you or your department.
View ScreenshotSelect drop down under Bookings profile image, then select New.
Set Up Booking Page
Use the links in the left navigation to set up your Bookings content.
Business Information
Add contact information, URLs, logo, and set business hours. If this is for your own bookings page, you can set your hours here. If this booking page is for multiple staff, set your business hours for your department or group. If the individual staff hours are different from the business hours, they can set their own hours under the Staff link.
Staff
If this is a departmental account, you’ll need to add staff, additional contact information, and hours of availability if different from Business hours.
- Choose the Staff link in the left navigation.
- Select +Add Staff at the top of your view.
View ScreenshotSelect Staff from left panel, then Add staff from top of interface. - Select their role located below the Phone number field.
View ScreenshotSelect role for the staff member.- Administrators can edit all settings, add and remove staff, and create, edit and delete bookings.
- Schedulers can manage bookings on the calendar and customer details. They have read-only access to settings, staff, and services.
- Team members can manage their availability as we as bookings assigned to them. When adding or editing a booking, they'll be assigned as a staff.
- Viewers can see all bookings on the calendar. They can't modify or delete them. they have have read-only access to Settings.
- Guests can be assigned to bookings, but they cannot open the bookings mailbox.
- Add their contact information.
- If a staff member’s hours are different from business hours, deselect box next to Use business hours and define hours. Staff given an Administrator role can edit their own availability, as well.
View ScreenshotSelect Staff from left panel, then Add staff from top of interface. - To edit or delete a staff member, select the name of the staff member to bring up options in the top menu.
Find more information about roles on the Microsoft support site.
Services
If you provide more than one type of service, you can create them here. When users set meetings with staff in your organization, they will first select the service they need. Example of services might include project consultation, meeting, advising appointment, presentation, etc.
- Go to Services in the left navigation.
- Select +Add a service at the top of the screen.
- Name your service.
- Set your default duration.
- Buffer time refers to any time before of after your meeting that you will need for set up, walking or travel time between appointments, etc.
- Allowing users to manage their bookings will give them options in the confirmation email of rescheduling or canceling without having to contact you. Their selections will be reflected in your calendar.
- Add email reminder with customized text, if applicable.
- Uncheck Online Scheduling options to customize additional options, such as designating how much advanced notice you need for the service (i.e. hour before, 24 hours before, etc.).
- Customize hours for this service if different than regular business hours.
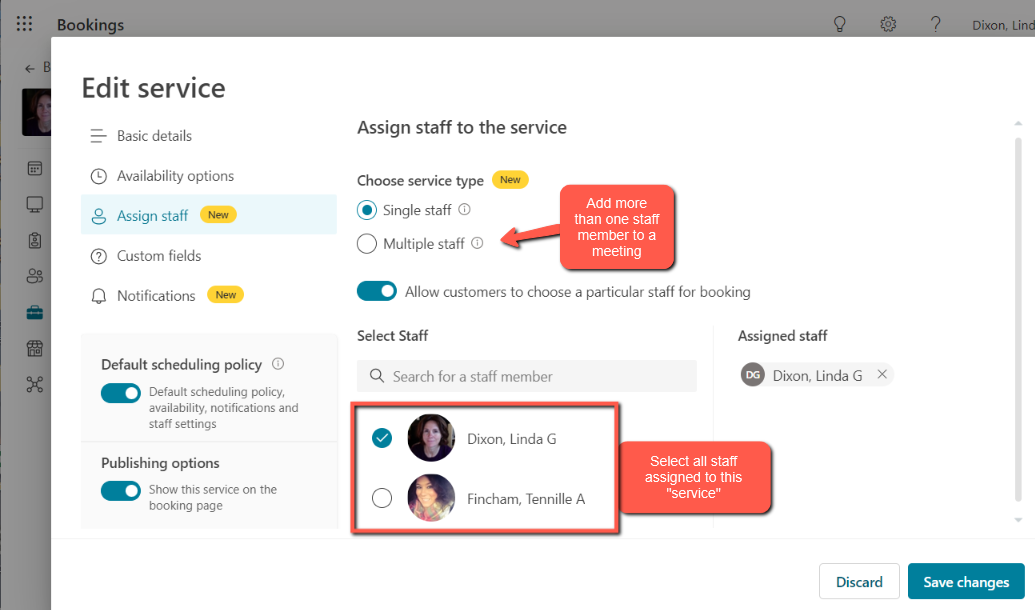
- Assign specific staff members to the service or leave it open to all staff.
View ScreenshotSelect Staff from left panel, then Add staff from top of interface.- NOTE: Single staff option means multiple staff can be assigned and the user chooses one for the meeting. The Multiple staff options means all staff assigned will be required to attend the meeting.
- You can copy or share a link to the service or use the link from the Booking page for all services.
Booking Page
Publish your page using the Save and Publish link at the top of your view. After you publish, a link will be generated that you can copy and send to users, post to social media, link or embed on your webpage.
Calendar
All bookings scheduled will populate in your Bookings calendar as well as your Outlook calendar. Both calendars will show names of those who scheduled the meeting and any answers to questions you asked in the Service EXCEPT for group appointments.
For group appointments, you will need to use the Bookings calendar to view all who have scheduled an appointment.
User Instructions
To set an appointment with others, you will use a link provided to you by the person with whom you're scheduling.
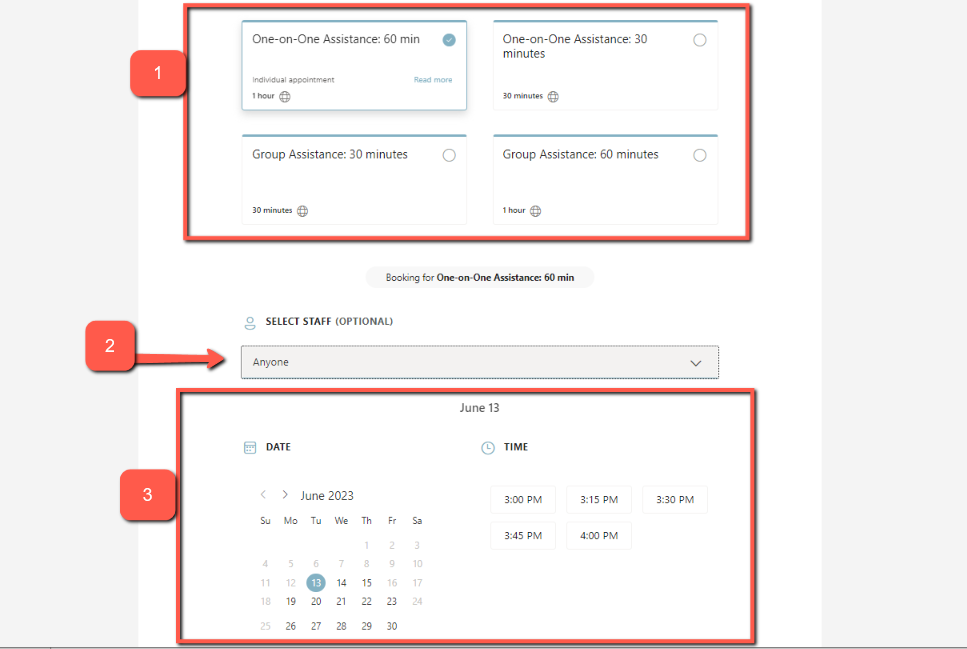
Once you link to a person's booking page, you will see "services" in the form of meeting appointment types.
- If you see more than one service, select the service you want.
- If there are multiple staff assigned to the service, you can select the individual or leave it randomly assigned.
- Select the time and date.
View ScreenshotSelect appointment type, specific person (if applicable), time/date. - Fill in all required fields.
Once you schedule the appointment, you will get a confirmation email that can include a variety of options and information in the email message. Feature options can include:
- Attached meeting invitation you can add to your Outlook.
- Link to join the meeting through Teams.
- Link that will allow you to reschedule or cancel the meeting.
- Additional information you'll need for the meeting.
- Reminder emails.
Add Appointment to Outlook
The meeting invitation will an attachment in the confirmation email. To add it to your Outlook calendar:
- Select the down arrow on the attachment.
- Select Open.
- Select Yes to Add this Internet Calendar to Outlook.
- Select Accept.
The meeting invitation in your calendar will contain the same information found in the confirmation email, including links to the meeting, additional information (if applicable), and rescheduling and cancelling meeting.
Answers to Common Issues
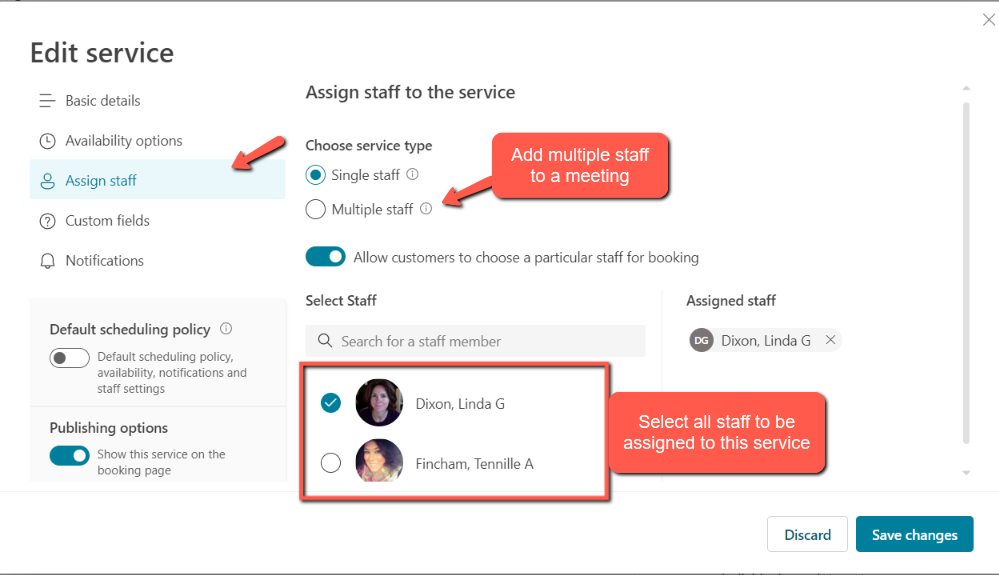
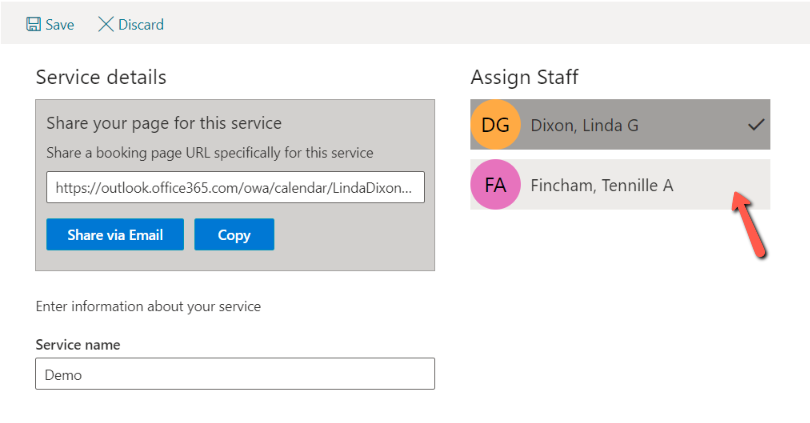
Why aren't all staff listed for a service?
Be sure to select staff for a given service or they will not appear during scheduling.
View Screenshot
Select name of staff member to add to service. Select name will show checkmark.
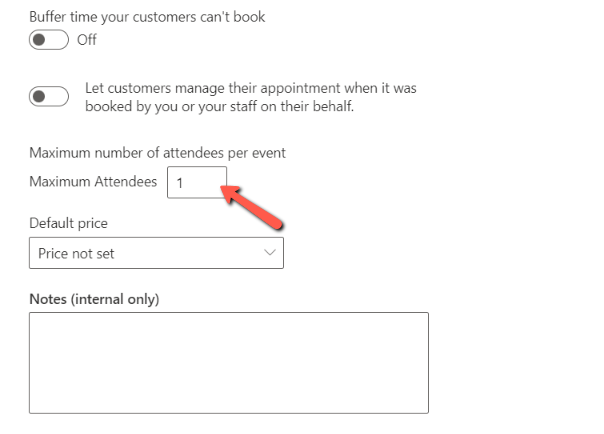
Max Number of Attendees
If you create a session with a maximum number of attendees as 1, you cannot add another person to the meeting by sending them the link.
View ScreenshotSelect name of staff member to add to service. Select name will show checkmark.
After you save a service, you cannot change from one person maximum to more than one person; that option will be grayed out. If you want to the service to be available for more than one person or for a group, you will need to recreate it and be sure the maximum number is at least 2. You can increase that number at later time.
Names of attendees for individual sessions will appear in your Outlook calendar, but not for group sessions. To find attendees names for group meetings, go to the calendar in Bookings.
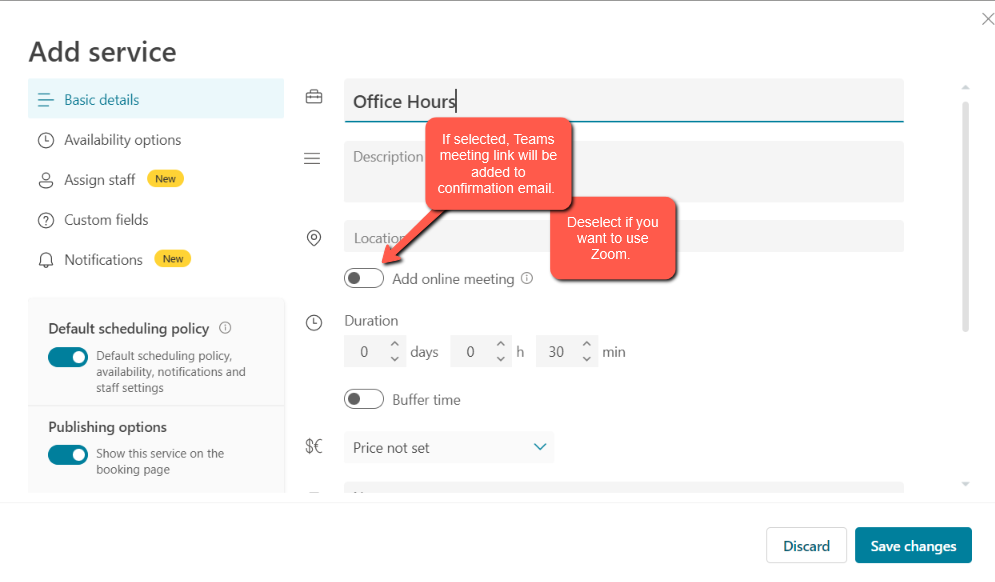
Zoom Instead of Teams
To use Zoom instead of Teams for online meetings:
- While editing your service, select Basic Details from the left menu.
- Toggle Add online meeting to off.
View ScreenshotChange number of maximum attendees. - Select Notifications from left menu.
- Copy/paste the Zoom link and password in the Additional Information for Email Confirmation field.
View ScreenshotChange number of maximum attendees.
How to delete unused Bookings Pages
You will need to contact the office365support_sn@ku.edu for assistance.
Calendar Times are Off
If your appointments are missing or at the wrong times, check your time zone settings.
- Go to Booking page in left pane
- Select Region and time zone settings
- Select UTC-06:00 Central Time
Bookings Appointment Times Listed Incorrect
If you have multiple staff listed for a service everyone's times will be listed as options. If this is not the case, check your time zone settings. See previous heading for instructions.
Getting Two Notifications?
If you get two email notifications, go to Bookings page > Default Scheduling Policy > deselect the checkbox Notify the business via email when a booking is created.
View ScreenshotDeselect checkbox next to Notify the Business ...
Support
Technical Support: itcsc@ku.edu | 785-864-8080
Schedule an Overview or Training Support: training@ku.edu | 785-864-5155