Clipchamp (Stream)
Overview
Stream video player and Clipchamp video editor have been combined and is now rebranded as Clipchamp. This new experience provides access to all your video content created from your meetings, videos shared with you, video files stored in the cloud and includes additional editing features.
All video files recorded from meetings, shared with you, stored in the Microsoft 365 Cloud and be found in Clipchamp.
With Clipchamp, users can:
- Upload video files.
- Use the recording feature to record yourself or capture a screen recording.
- Generate a transcript and closed captions for the language spoken in a video in SharePoint, Teams, or OneDrive.
- Manually add chapters, letting a viewer jump to the topic of interest.
- Collaborate with comments, just like with any other Microsoft 365 document
- Add custom thumbnails, titles, and descriptions.
- Share videos with others, including external partners or guests, just like you share any other file.
- Create playlists.
- Get analytics to know how your viewers are watching.
- The Editor adds features, like graphics for overlays, background music, stock images, transitions, etc.
Access Clipchamp
Two ways to access Clipchamp (Stream)
I. Open in Teams
- Select the 3 dot icon in the left app bar.
Search for Clipchamp and select.
View ScreenshotTo pin this app to your app bar, right click on the app icon while visible in the app bar, then select pin from the options.
View Screenshot
II. Use the Microsoft 365 Landing Page
- Go to Microsoft 365 landing page and log-in using your user ID an password.
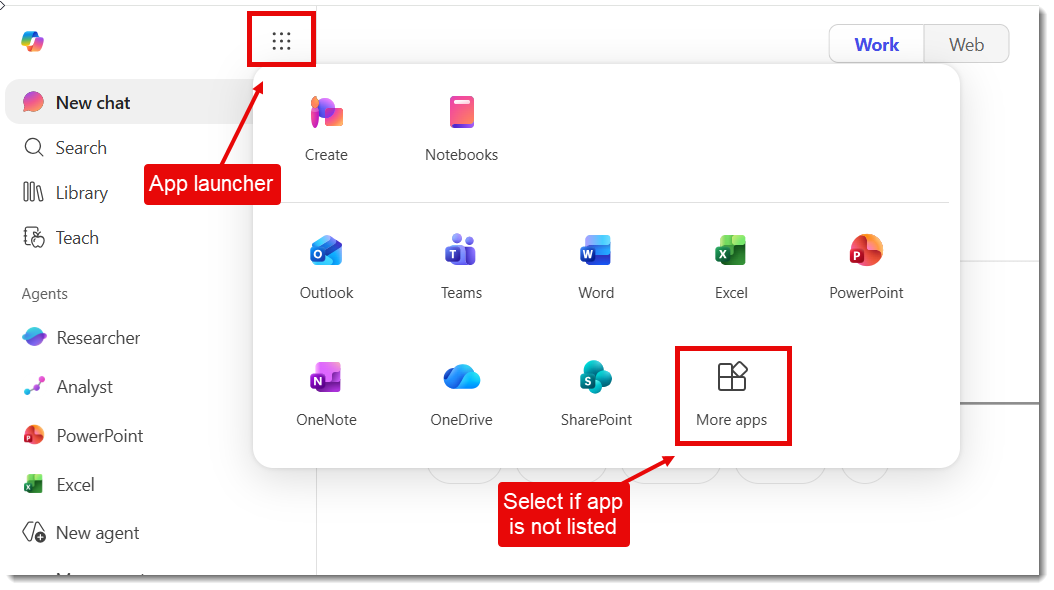
- Select the App launcher "waffle" icon from the top of the left menu, then select More Apps at the bottom right of the window.
View ScreenshotSelect All apps at bottom right area of window.
Find Meeting Recordings
The storage location of your meeting recordingsdepends on where you began your recording. Folders titled Recordings will populate after your first recording is made.
| Recorded from: | Storage location |
|---|---|
| Teams Chat | Meeting organizer’s OneDrive in Recordings folder. |
| Outlook meeting | Meeting organizer’s OneDrive in Recordings folder. |
| Teams channel | Teams Shared tab and respective SharePoint document library in Recordings folder. *Channel meeting recordings temporarily found in channel Post area. |
| Clipchamp (Stream) | Meeting organizer’s OneDrive, outside of the Recordings folder. |
Temporary Access
Temporary access to videos will be available in the Activity app for Chat recordings and Teams channel posts for recordings made from a channel meeting.
Learn more abouthow to record meetings on our Teams meetings instructional page.
Upload and Share Videos
Upload Videos
Uploading video files not created in Microsoft 365 works just like any other file type. You can upload to OneDrive, SharePoint document library or Teams files. These will show up in the Clipchamp for easy access.
Share Videos
You can share access, set permissions, and remove access to videos the same as sharing any file from your Cloud apps. Find more information about sharing files in our SharePoint Share Files documentation.
Add to MediaHub & Canvas
MediaHub
MediaHub is an online platform where KU faculty and staff can host videos and make them available for viewing. Find more information and resources for the MediaHub platform.on the KU Technology site.
- Log in to Clipchamp and access your videos using the directions above.
- Next to the appropriate video, select the More Options icon.
View ScreenshotSelect 3 dots for more options. - Choose Download video.
- Go to MediaHub.
- Log in using your KU credentials.
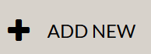
- Select add new from the top menu.
View ScreenshotSelect Add New from top menu. - Select Media Upload.
- Select Choose a file to upload.
- Add media information such as a title and description.
- Select Save.
Canvas
Videos can be added to Canvas via MediaHub/Kaltura.
- Add Clipchamp video to MediaHub using the instructions above.
- Log into Canvas and select a course.
- Navigate to any content area in your course.
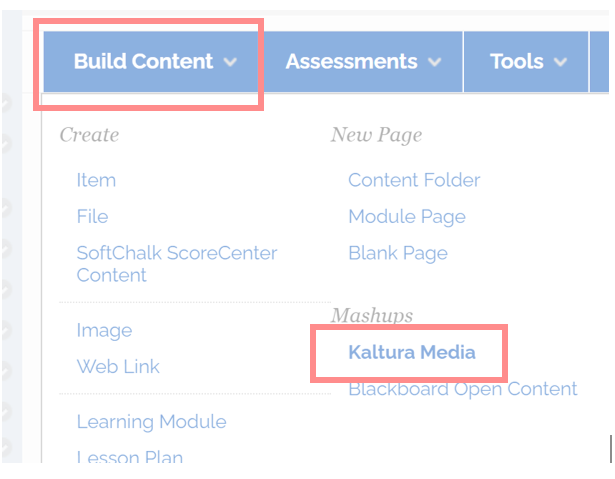
- Select Build Content, then Kaltura Media.
View ScreenshotSelect Build Content, then Kaltura Media. - Find the recording file. You can search by Title, Description or Tag.
- Choose the Select button for the correct recording.
- Choose your display options and click Embed.
- Give the content area item entry a Title and Description and set access options.
- Select Submit.
- Your file will begin transcoding / processing.
Video Expiration
By default, KU’s retention policy for videos recorded in Clipchamp or Teams will expire 500 days after they are recorded. Messages that read “no expiration date” will be overridden by KU’s policy.
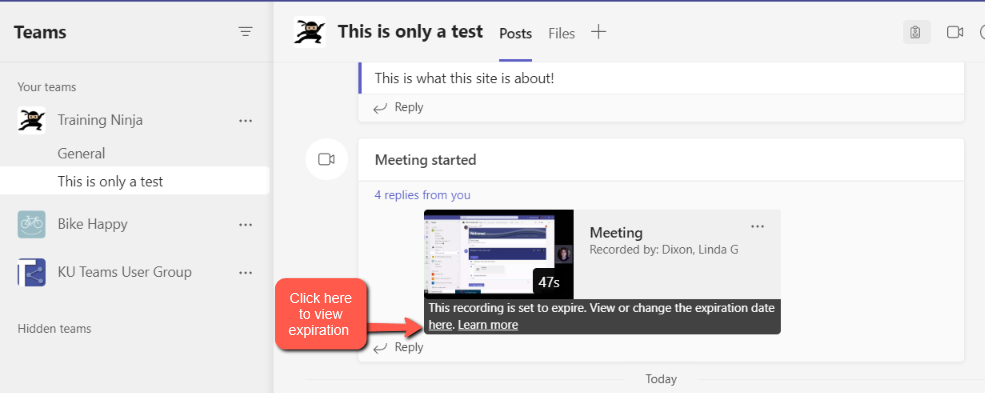
Recordings created in Teams meetings can temporarily be view in the Post area. To view and/or change the expiration date:
- Select the See Details link in the post.
View ScreenshotSelect the Details link. - To view and/or edit, hover over the expiration date and select Change, which will take you to the video Clipchamp.
View ScreenshotSelect Change.
If you want to retain these videos for a longer period or indefinitely, you have two options:
- To save indefinitely, download the video to your local computer and upload the video to MediaHub.
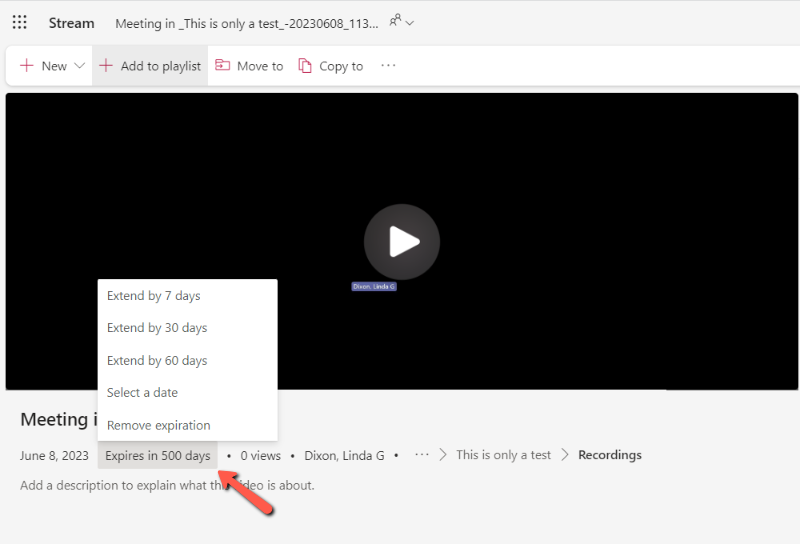
- Extend the expiration date of the video saved in a Microsoft app:
- Go Clipchamp and open the video.
- Select the expiration information below the video title.
- Make your selection.
View ScreenshotSelect expiration option.
Video Editing & Settings
You can manage basic features in your video settings area.
View Screenshot
Features in the Video settings:
- Create a thumbnail image.
- Trim video.
- Generate transcription and captions.
- Create chapters so users can jump to topics of interest in your video.
- Analytics shows number of viewers and views.
Editing Tools
Clipchamp provides additional editing tools beyond what was offered in Stream. Find the editing tool in the top menu in Clipchamp.
View Screenshot
Clipchamp editing features:
- Add text overlay
- Background music
- Use Microsoft stock videos and images
- Graphics overlay
- Transitions between clips
- Upload custom or KU branding assets
View Screenshot
Support
Technical Support: ithelpdesk@ku.edu | 785-864-8080
Training Support: training@ku.edu | 785-864-5155